
When your AC starts blowing warm air in the middle of a Florida afternoon, most homeowners think the same thing first: thermostat, breaker, or dirty filter. Then the house keeps getting hotter, the system runs longer, and you hear a strange hiss or see frost where it shouldn't be. That's usually when the stress sets in.
A refrigerant leak is one of the more confusing AC problems because the symptoms overlap with other issues, but the fix is completely different. A proper freon leak air conditioner repair isn't about topping the system off and hoping for the best. It's about finding the leak, judging whether that repair makes financial sense, and fixing it in a way that won't leave you paying for another service call a few weeks later.
Is Your AC Blowing Warm Air The Top Signs of a Freon Leak
Florida homeowners usually notice the comfort problem first. The thermostat is set where it always is, but the air from the vents feels weak, humid, or flat-out warm. The system may still run, but it doesn't pull heat out of the house the way it should.

A refrigerant leak often creates a chain reaction. Low refrigerant changes system pressure. That pressure drop can make parts of the coil get too cold, which is why you may see ice even while the house feels hot. Homeowners find that part especially frustrating because it seems backward.
What you may notice around the system
- Warm air from the vents. The unit may run for long stretches without bringing the temperature down.
- Hissing or bubbling sounds. According to Trane refrigerant leak warning signs, two of the most direct indicators are audible hissing sounds and visible oil stains around AC components.
- Ice or frost on copper lines. Frost on the refrigerant line or indoor coil usually means the system is operating outside normal conditions.
- Oily residue near the equipment. Refrigerant leaks often leave oil behind where the leak is occurring.
- Long run times with poor comfort. The AC may keep trying, but it can't move heat efficiently with a low charge.
What these symptoms usually mean
A small leak can start with subtle performance loss. A larger one tends to show itself fast. If the line set has a pinhole, the coil has corrosion, or a connection has opened up, the system may cool a little in the morning and fail badly by late afternoon.
If you hear hissing and see oil together, treat that as a strong warning sign. Don't assume a simple thermostat reset will solve it.
Not every warm-air complaint is a refrigerant leak. Airflow problems can mimic it, and that's why visual checks matter before anyone jumps to conclusions. If you're also trying to sort out efficiency problems in the house as a whole, it can help to understand Aeroseal duct sealing prices so you can separate duct loss issues from refrigerant-related cooling problems.
What Homeowners Can Safely Check Themselves
You can do a useful first inspection without tools, gauges, or touching any sealed system components. The key is to stay on the safe side of the line. Look, listen, and document what you find. Don't open panels, don't loosen fittings, and don't try any recharge products.
Safe checks that help narrow the problem
Start at the thermostat and work outward. Keep it simple.
- Check the air filter. A clogged filter can restrict airflow enough to create freezing symptoms that look similar to a leak. If the filter is dirty, replace it and let the system thaw before judging performance.
- Look at the copper refrigerant line. If you see frost or ice, turn the cooling off so the coil can thaw. Running it frozen can make diagnosis harder.
- Inspect around the indoor unit and outdoor condenser. Look for oily spots, staining, or dirt stuck to an oily patch.
- Listen near the equipment. Hissing or bubbling can help a technician narrow the search area later.
- Check airflow around the outdoor unit. Clear leaves, grass clippings, or debris from the sides of the condenser so air can move properly.
What not to do
Some things create more risk than value.
- Don't touch refrigerant lines or valves. They may be cold, pressurized, or both.
- Don't chip ice off coils or tubing. That can damage the metal and turn a manageable repair into a bigger one.
- Don't use store-bought sealants. They can contaminate the system and complicate professional repair.
- Don't keep forcing the system to run if it's freezing or obviously not cooling.
Practical rule: If the AC has ice on it, shut cooling off and switch the fan to On if your thermostat allows it. Let the system thaw before service. A frozen system can hide the actual leak location.
What to tell the technician
A short list helps more than most homeowners realize:
- When the cooling problem started.
- Whether the issue is constant or comes and goes.
- Any hissing sounds, frost, or visible oil.
- Whether anyone recently added refrigerant.
That last point matters. A system that was recently recharged and is already struggling again usually needs a careful leak search, not another quick refill.
Why Freon Leak Repair Requires a Certified Technician
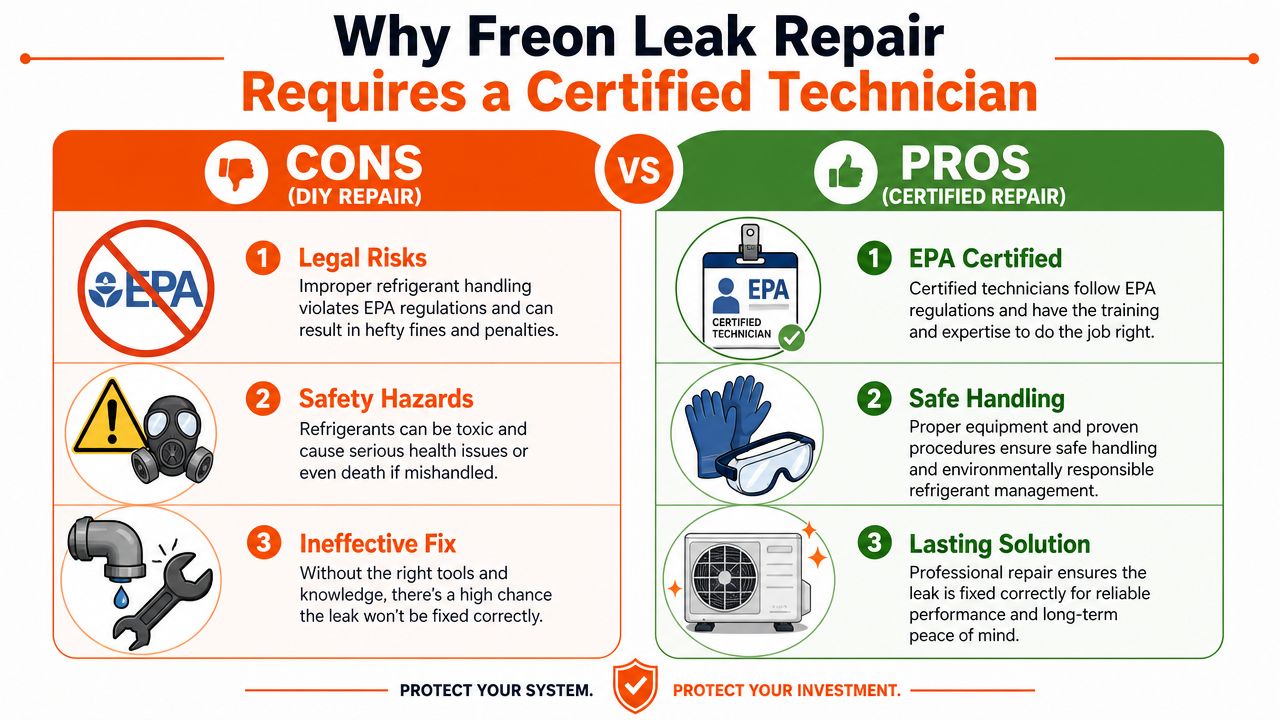
A refrigerant leak isn't a handyman job. It involves regulated materials, pressure testing, recovery equipment, and leak detection tools most homeowners will never own or need. Even when the leak seems obvious, the primary challenge is confirming exactly where it is and whether the repair will hold.
The legal and technical side
The EPA requires repair action on larger comfort-cooling leaks. For comfort cooling appliances, a leak that exceeds the 10% leak rate trigger must be repaired within 30 days, and the process includes initial and follow-up verification tests by a certified professional, as outlined in the EPA leak repair requirements.
That requirement tells you something important. This work is supposed to be verified, not guessed at.
A qualified technician doesn't just add charge and leave. The better approach usually includes electronic leak detection, dry nitrogen pressure testing, and, in stubborn cases, fluorescent dye to confirm the exact source of a small or recurring leak. Electronic detectors can sense refrigerant at extremely low concentrations, and nitrogen testing helps isolate leaks in sections that are hard to access.
Why quick top-offs usually disappoint
If refrigerant has left the system, it escaped somewhere. Recharging without sealing the leak is usually temporary. That's especially true with micro-leaks and worn coils.
A technician also has to judge whether the leak is in a repairable spot. An accessible copper connection is one thing. A corroded evaporator coil with multiple weak points is another.
Certified leak repair is partly about safety, but it's also about avoiding false savings. The cheap visit is often the one that leads to the second and third visit.
Homeowners who value proof of workmanship often look for signs of real service accountability, such as customer review snapshots and service reputation, because leak repairs depend heavily on technician judgment, not just parts.

Estimating Your Air Conditioner Leak Repair Costs
It's common to ask the cost question before the repair question, and that's understandable. Refrigerant leaks can be inexpensive to fix when the leak is accessible and the refrigerant charge is small. They can also get expensive quickly when labor stacks up, the coil is damaged, or the system uses a pricier refrigerant.
According to Angi's AC freon leak repair cost guide, the average cost for AC freon leak repair ranges from $250 to $1,600, with homeowners typically paying an average of $800.
Typical cost breakdown
| Service Component | Estimated Cost Range |
|---|---|
| Leak detection | $100 to $450 |
| Refrigerant line repair | $200 to $1,500 |
| Evaporator coil repair or replacement | $600 to $2,000 |
| Refrigerant for a standard one-ton AC unit | $100 to $350 |
| Portable AC repair | $100 to $400 |
| Ductless mini-split repair | $350 to $1,200 |
| Central air repair portion | $450 to $2,000 |
Why estimates vary so much
Three jobs can all be called "freon leak air conditioner repair" and have very different totals.
First, location of the leak drives labor. A visible line leak is usually more straightforward than a coil leak buried in the air handler. Second, the type of refrigerant affects material cost. Third, system type matters. Portable units are cheaper to work on, while central systems and ductless equipment usually involve more labor.
Labor itself can range from $100 to $250 per hour in the same Angi data, which is why two homeowners with the same symptom may get very different quotes.
Repairs that become replacement conversations
For major leaks, the median repair cost is $800 in the same source. But there's a point where continuing to fix an older system stops making sense. A full central AC replacement can run $3,900 to $8,030, so the right decision depends on more than the immediate invoice. It depends on leak location, unit age, and whether the repair is likely to last.
The Critical Choice Repair or Replace Your Leaking AC
Most homeowners require a clear answer. Some leaks should be repaired. Some systems should be replaced. The expensive mistake is treating every leak like it deserves the same response.

A practical decision framework
Use these three filters together.
Leak type and location
A leak in an accessible copper line or braze point is often the best repair candidate. The technician can isolate it, repair it directly, pressure test it, evacuate the system, and recharge it with a clear reason for confidence.
A leaking evaporator coil is a harder call. If the coil has broad corrosion or multiple weak spots, replacing the coil may be the only real repair path. If the line set is buried in a wall or insulation, labor can become the deciding factor even if the leak itself is small.
System age
Older systems deserve more scrutiny before you approve major leak work. Industry data tied to major leak repairs on aging systems indicates technical success rates can be as low as 50%, meaning homeowners can spend over $1,400 on a repair that may not last, as noted in the earlier EPA-backed discussion.
That doesn't mean every older unit should be replaced. It means you should demand a realistic explanation of repair feasibility, not a vague promise.
Repair cost compared to replacement cost
If the repair estimate climbs into major-coil territory, compare it to the replacement path immediately. American Standard notes that complex leak repairs can reach $1,200 to $3,000 or more, evaporator coil replacement can become a major cost driver, and a full system replacement tied to refrigerant transition can run $3,000 to $6,000 in some cases, as described in American Standard's repair-versus-replace discussion.
If the leak is accessible, the unit isn't too old, and the repair addresses one clear failure point, repair usually makes sense. If the system has age, corrosion, and a hard-to-access leak, replacement often protects your wallet better.
What works and what usually doesn't
Usually worth repairing
- Single accessible line leak
- Newer system with otherwise solid condition
- Clear leak confirmation followed by pressure testing
Often poor value
- Multiple coil leaks
- Recurring leaks after prior recharge
- Inaccessible line set leaks inside walls
- Aging equipment with major labor and uncertain outcome
Replacement also opens the door to better efficiency and a cleaner long-term operating plan. If you're comparing HVAC options beyond standard split systems, this is also a good time to lower energy bills with geothermal and understand how different system designs affect future utility costs.
Some homeowners find it helpful to look at real-world home comfort upgrade examples when they're weighing whether to keep patching old equipment or move to a new system.

Your Next Step for Fast AC Repair in Tampa Bay
If your AC is blowing warm air, freezing up, or losing cooling again after a recent recharge, don't wait for it to sort itself out. Refrigerant doesn't get "used up" like gas in a car. If it's low, the system needs diagnosis.

A recurring leak after recharge is common. Data cited by Carrier suggests 30% to 40% of recharged units fail again within 6 months because micro-leaks were never sealed, which is why Carrier's refrigerant leak guidance emphasizes proper diagnostics such as pressure testing.
What to have ready when you call
A faster service visit starts with a few details:
- Your AC symptoms. Warm air, ice, hissing, short cooling cycles.
- Any recent refrigerant service. That helps identify repeat-leak scenarios quickly.
- System type. Central air, mini-split, or portable unit.
- Age of the equipment if you know it. That helps frame the repair-versus-replace discussion.
If the problem includes tripped breakers, burnt smells, or suspected wiring issues near the equipment, review a Tampa electrical emergency guide before anyone touches the system. AC problems and electrical problems sometimes overlap, and safety comes first.
For homeowners who want to see a local service presence before booking, this Tampa Bay community feature image gives useful context.

For a quick visual on what professional AC service looks like, watch this short clip:
The right next step is simple. Get the leak confirmed, get the repair options explained clearly, and make the decision based on leak location, system age, and total cost, not guesswork.
If you need help now, contact Heatwave Air Conditioning, Plumbing, & Electric. Their certified technicians serve Tampa Bay and Southwest Florida, work on all major brands, and can help you decide whether your leaking AC is a smart repair or a better replacement candidate. Call (813) 343-2212 or use the contact options on their website to schedule service.