
Your home's electrical system is its central nervous system, powering everything from your air conditioning on a hot Florida day to your nightly entertainment. But behind the walls, hidden dangers can lurk, posing significant risks of fire, shock, and system failure. A thorough electrical inspection is not just a formality when buying or selling a home; it's a critical safety measure for every homeowner in communities from Tampa Bay to Cape Coral.
This definitive 10-point home electrical inspection checklist will empower you to identify potential issues, understand what professionals look for, and take proactive steps to ensure your home is both safe and compliant. We'll break down each critical component, from the main service panel to the outlets you use every day, providing actionable insights to safeguard your family and property. For those involved in new construction or major renovations, a detailed electrical rough-in inspection checklist provides critical insights into foundational wiring and panel safety. Think of this guide as your roadmap to a safer, more reliable electrical system, ensuring you're never left in the dark about potential hazards.
1. Panel and Breaker Box Inspection
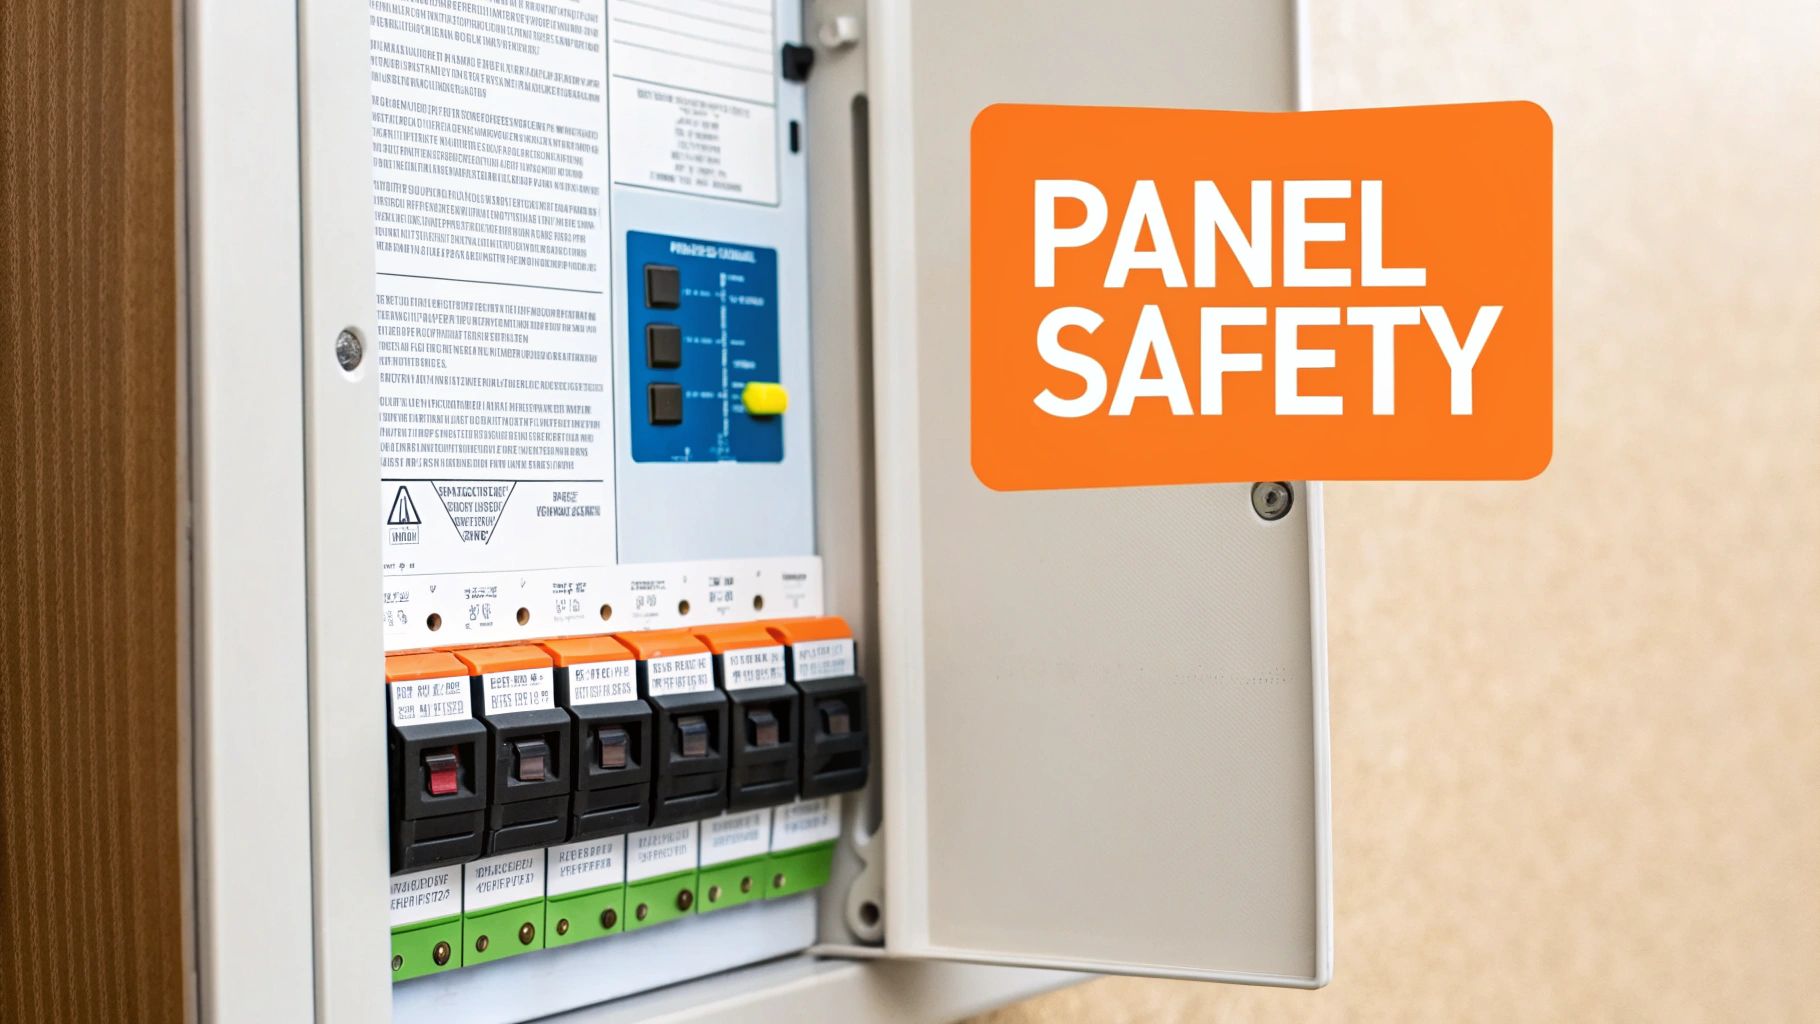
The electrical panel, often called the breaker box, is the heart of your home's electrical system. It acts as the central hub, receiving power from the utility company and distributing it safely to every circuit in your house. A thorough panel inspection is the first and most critical step in any comprehensive home electrical inspection checklist.
Inspectors scrutinize the panel for a variety of safety and performance issues. This includes checking for a clear and accurate circuit directory, ensuring breakers are correctly sized for their corresponding wires, and looking for any signs of physical damage like corrosion, rust, or burn marks, which often indicate overheating or moisture intrusion.
Key Inspection Points and Common Issues
Professionals focus on specific hazards that homeowners often overlook. A licensed electrician can identify outdated and dangerous panels, such as certain Zinsco or Federal Pacific models known for high failure rates. They also look for common wiring mistakes that pose significant fire risks.
Common problems discovered during a panel inspection include:
- Double-Tapped Breakers: Two wires connected to a single breaker terminal that is only designed for one. This can cause loose connections and dangerous arcing.
- Improper Breaker Sizing: A 20-amp breaker on a circuit with 14-gauge wire (which should have a 15-amp breaker) creates a fire hazard because the wire can overheat before the breaker trips.
- Environmental Damage: Panels located in damp basements or garages without proper protection are susceptible to water damage and corrosion, compromising their integrity.
Pro Tip: Never attempt to open or modify your electrical panel yourself. The risk of severe electrical shock is extremely high. This task should only be performed by a qualified and licensed electrician.
Actionable Tips for Homeowners
While you should leave the internal inspection to the pros, you can take steps to ensure your panel is safe and accessible.
- Ensure Accessibility: Keep the area in front of your panel clear for at least three feet. Do not block it with storage, furniture, or other obstructions.
- Check Labeling: Open the panel door and check if the circuit directory is filled out and legible. If it's not, consider having an electrician map and label your circuits accurately.
- Know Its Age: If your panel is over 25 years old or you experience frequent breaker trips, it's a good time to schedule a professional inspection.
2. Outlet and Switch Condition Assessment
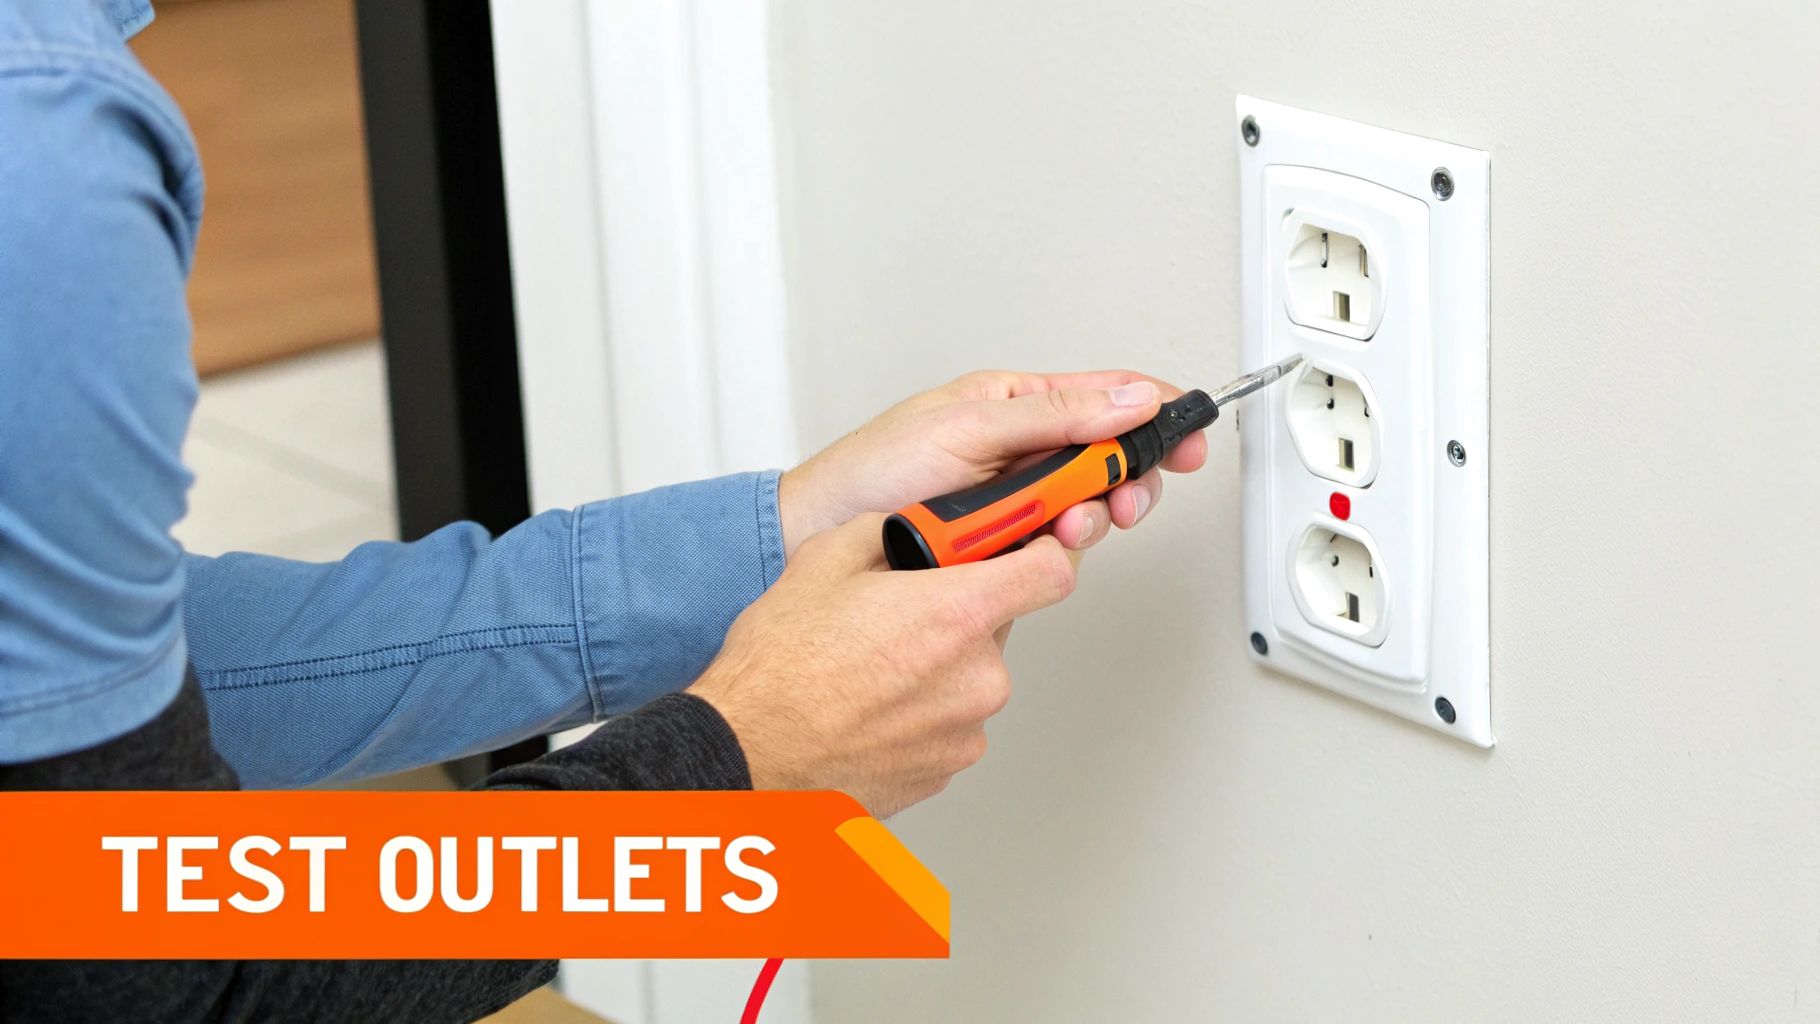
Outlets and switches are the primary points of interaction with your home's electrical system, making their condition crucial for daily safety and functionality. This part of a home electrical inspection checklist involves a detailed examination of every accessible outlet and light switch. An inspector checks for proper installation, secure connections, and correct functionality to ensure they don't pose a shock or fire hazard.
Inspectors use specialized tools to test outlets for correct polarity (ensuring hot and neutral wires are properly connected) and grounding, which is vital for protecting you and your appliances from electrical faults. They also visually inspect for physical damage like cracked faceplates, burn marks, or loose fittings that could indicate underlying wiring problems.
Key Inspection Points and Common Issues
Professionals methodically test each receptacle and switch, identifying hidden dangers that can easily go unnoticed. They confirm that safety features like Ground Fault Circuit Interrupters (GFCIs) are installed in required areas such as kitchens, bathrooms, and outdoor spaces, and that they function correctly. Discovering these issues early is key to preventing serious electrical incidents.
Common problems discovered during an outlet and switch assessment include:
- Reversed Polarity: When the hot and neutral wires are swapped at an outlet, creating a serious shock hazard for certain appliances even when they appear to be off.
- Ungrounded Outlets: Older homes often have two-prong outlets that lack a ground wire, leaving users and sensitive electronics unprotected from power surges and faults.
- Loose Connections: Outlets that feel loose when you plug something in often have worn internal contacts or loose wiring, which can lead to arcing and a potential fire.
Pro Tip: Test your GFCI outlets monthly by pressing the "TEST" button to ensure the power cuts off, then press "RESET" to restore it. If a GFCI outlet fails to trip, it should be replaced immediately by a qualified electrician.
Actionable Tips for Homeowners
You can perform a basic visual check of your outlets and switches to spot obvious issues before calling a professional.
- Look for Damage: Regularly scan for cracked, broken, or discolored faceplates. Check if any outlets feel hot to the touch, which indicates a dangerous overload or wiring problem.
- Check for Loose Fits: If a plug feels wobbly or falls out of an outlet easily, the internal contacts are worn out. These outlets should be replaced to prevent poor connections.
- Test All Outlets: Use a simple and inexpensive plug-in outlet tester to check for common wiring issues like open grounds or reversed polarity. Learn more about how to identify and address these common electrical problems on heatwavehvac.com.
3. Grounding and Bonding System Verification
The grounding and bonding system is a critical safety feature that provides a safe path for electrical current to travel to the earth during a fault, like a short circuit. It's designed to protect people from dangerous electrical shocks and sensitive electronics from power surges. Verifying this system is a non-negotiable part of any home electrical inspection checklist, as it is your primary defense against electrical hazards.
Inspectors check that the main grounding electrode conductor is properly connected to a grounding rod or the home's water main. They also ensure all metallic systems, such as gas lines and water pipes, are bonded together. This creates an equal electrical potential across all conductive materials, preventing them from becoming energized during a fault.
Key Inspection Points and Common Issues
An electrician will trace the grounding path from the panel to its final termination point. This comprehensive check identifies breaks or weaknesses in this essential safety net, which are often hidden from plain sight but pose a serious risk.
Common problems discovered during a grounding inspection include:
- Corroded or Loose Connections: The connection to the grounding rod can rust or loosen over time, especially in Florida's humid climate, rendering it ineffective.
- Missing Bonding Jumpers: Metal water meters or plumbing repairs can interrupt the grounding path. A bonding jumper is required to maintain continuity.
- Improperly Bonded Gas Lines: Flexible gas lines require specific bonding connections to prevent them from rupturing during a nearby lightning strike, which could cause a fire or explosion.
Pro Tip: Your home's grounding system not only protects against faults within the house but is also the first line of defense against external surges from lightning. A properly installed system can save your expensive electronics.
Actionable Tips for Homeowners
While a professional should perform the technical verification, homeowners can take a few steps to be proactive about their grounding system's integrity. Learn more about the intricacies of grounding and bonding system verification to better understand its importance.
- Keep the Grounding Rod Accessible: Know where your grounding rod is located (usually near your electrical meter) and keep the area clear of landscaping, mulch, and debris.
- Visually Inspect Connections: Look for visible signs of corrosion or damage on the clamp and wire connecting to your exterior grounding rod or water pipe.
- Consider Whole-Home Surge Protection: Ask your electrician about installing a surge protector at your main panel. This device works with your grounding system to divert large voltage spikes away from your home.
4. Wire Gauge and Amperage Matching
Properly matching wire gauge to circuit breaker amperage is a non-negotiable safety rule in your home’s electrical system. The breaker is a safety device designed to shut off power when the current exceeds a safe limit for the wire it protects. If the wire is too small for the breaker’s amperage rating, it can overheat dramatically before the breaker trips, creating a severe fire hazard. This critical check is a cornerstone of any professional home electrical inspection checklist.
Inspectors verify that the size (gauge) of the electrical wiring corresponds correctly to the amperage rating of the circuit breaker protecting it. This involves visually inspecting the wiring entering the panel and, where visible, throughout the home. For example, a standard 15-amp circuit must use 14-gauge wire or thicker, while a 20-amp circuit, common for kitchens and laundry rooms, requires 12-gauge wire.
Key Inspection Points and Common Issues
An electrician’s trained eye can quickly spot dangerous mismatches that could lead to disaster. They look beyond the panel to assess wiring for specific high-draw appliances and outlets, ensuring the entire circuit is safely configured from the breaker to the device. This is a common area where improper DIY work or outdated wiring can introduce significant risks.
Common problems discovered during a wiring inspection include:
- Undersized Wiring: The most dangerous issue is finding a 20-amp breaker protecting a circuit with 14-gauge wire. The wire can melt its insulation and ignite surrounding materials long before the breaker trips.
- Improper Kitchen or Bathroom Circuits: These high-use areas require 20-amp circuits by modern code. An inspector will check that they are not running on older, undersized 15-amp wiring.
- Oversized Breaker Installation: A homeowner might incorrectly replace a frequently tripping 15-amp breaker with a 20-amp one to "fix" the problem, unknowingly creating a major fire risk.
Pro Tip: Never assume a circuit is safe just because it works. The danger of mismatched wire gauge and breakers lies in its potential to fail catastrophically under heavy load, not during normal, light use.
Actionable Tips for Homeowners
While a comprehensive assessment requires a professional, you can be vigilant about your home’s circuits. Understanding the basics helps you identify when to call an electrician. For a deeper dive into what professionals look for, you can learn more about electrical wiring inspections.
- Document What You See: If you can safely see wire markings and the breaker amperage, note them down. Any discrepancy, like "14 AWG" wire on a "20" amp breaker, warrants an immediate professional call.
- Address Tripping Breakers Correctly: If a circuit breaker trips repeatedly, it's a sign of an overload or a fault, not a faulty breaker. Do not replace it with a higher-amperage one. Call an electrician to diagnose the root cause.
- Keep Records: If an electrician corrects any wiring or breaker issues, keep detailed records of the work performed. This documentation is valuable for insurance purposes and future home resale.
5. Knob and Tube Wiring Identification
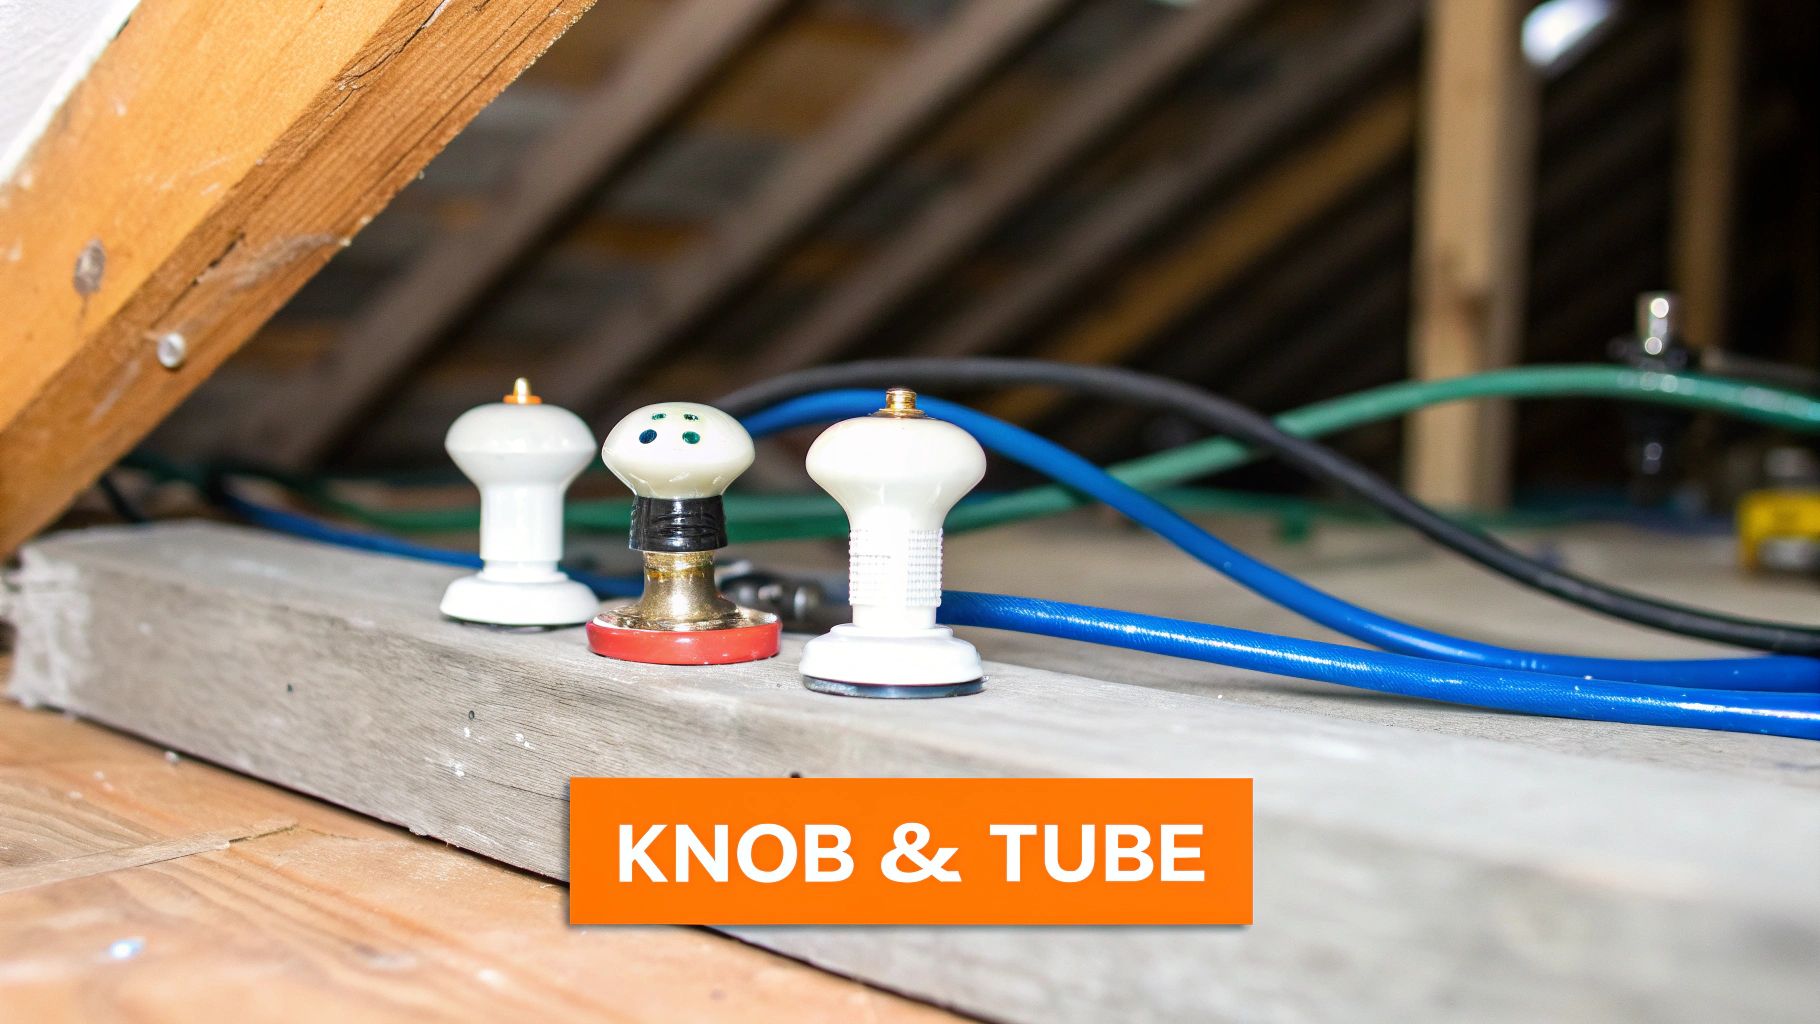
Knob and tube (K&T) wiring is an early, ungrounded wiring method used in homes built from the 1880s to the 1940s. A key part of any home electrical inspection checklist for older properties involves identifying its presence, as it poses significant safety risks and is uninsurable by many modern standards. This system uses porcelain knobs to suspend wires in open air and porcelain tubes to protect them when passing through wooden joists.
Inspectors typically find this outdated wiring in unfinished basements, crawl spaces, and attics of historic homes. While K&T was effective in its day, its lack of a ground wire, brittle insulation, and inability to handle modern electrical loads make it a serious fire hazard. Many insurance companies will refuse to cover a home with active K&T wiring, making its identification and replacement a critical step for both buyers and current owners of older homes.
Key Inspection Points and Common Issues
An electrician will meticulously search for signs of K&T, which is often hidden behind walls or ceilings. They look for the distinctive ceramic knobs and tubes, as well as cloth-covered wiring. A common and extremely dangerous issue is discovering K&T wiring buried in modern insulation, which prevents heat from dissipating and creates a severe fire risk.
Common problems associated with Knob and Tube wiring include:
- Improper Modifications: Homeowners or unlicensed handymen often tap into K&T circuits to add new outlets, improperly splicing modern wiring onto the old system.
- Brittle Insulation: The original rubberized cloth insulation becomes fragile over time, cracking and flaking off to expose live wires.
- Lack of Grounding: K&T is a two-wire system with no ground wire, leaving modern appliances and electronics unprotected from power surges and creating a shock hazard.
Pro Tip: Never assume an older home has been fully rewired, even if you see modern outlets. K&T can still be live and hidden within walls. Only a thorough inspection by a qualified electrician can confirm its presence or complete removal.
Actionable Tips for Homeowners
If you own or are considering buying a home built before 1950, being proactive about K&T is crucial for safety and financial reasons.
- Schedule a Specialist Inspection: Hire an electrician experienced in older homes to specifically look for K&T in the attic, basement, and behind switch plates.
- Budget for Replacement: If K&T is found, obtain quotes for a complete home rewire. This is a significant but necessary investment to ensure your home's safety and insurability.
- Check with Your Insurer: Contact your insurance provider to understand their policy on K&T wiring. Many will require its complete removal before issuing or renewing a policy.
6. Aluminum Wiring Assessment
Aluminum wiring, commonly installed in homes built between the mid-1960s and mid-1970s due to a copper shortage, is a significant safety concern. While not inherently dangerous, its properties differ from copper, leading to a higher risk of fire. Aluminum expands and contracts more than copper and is prone to oxidation, which can cause loose, overheating connections at outlets, switches, and fixtures.
An inspector will identify the presence of aluminum branch circuit wiring, which is a critical part of any home electrical inspection checklist. They look for specific markings on the wire sheathing (like "AL" or "ALUMINUM") and its distinctive silver color at connection points. This assessment is vital because aluminum connections require special handling and components to remain safe over time.
Key Inspection Points and Common Issues
The primary danger with aluminum wiring lies at the connection points. According to the U.S. Consumer Product Safety Commission (CPSC), homes with aluminum wiring are 55 times more likely to have one or more connections reach "Fire Hazard Conditions" than homes wired with copper.
Common problems discovered during an aluminum wiring assessment include:
- Improper Connections: Standard outlets and switches rated only for copper wire (stamped "CO/ALR") are often found incorrectly installed on aluminum circuits, creating a severe fire risk.
- Oxidation and Corrosion: At termination points, aluminum wire forms an oxide layer that increases resistance and heat, which can melt fixtures and ignite surrounding materials.
- Loose Terminations: The tendency for aluminum to expand and contract can cause screws at terminals to loosen over time, leading to dangerous arcing and overheating.
Pro Tip: If your home was built between 1965 and 1975, ask your electrician to specifically check for aluminum wiring. Flickering lights, warm switch plates, or a smell of burning plastic can be warning signs.
Actionable Tips for Homeowners
Identifying and properly managing aluminum wiring is a job for a licensed professional. There are several CPSC-approved remediation methods.
- Schedule a Professional Evaluation: If you suspect you have aluminum wiring, have a qualified electrician assess the system and recommend the safest repair method.
- Use Proper Devices: Ensure any replacement switches or outlets are rated for aluminum wire (marked "CO/ALR"). The safest long-term solution involves using special connectors, like AlumiConn, to pigtail a short piece of copper wire to the device.
- Check with Your Insurer: Some insurance companies have specific policies regarding homes with aluminum wiring. Inform them of its presence and any remediation work performed to ensure your coverage remains valid.
7. GFCI and AFCI Protection Compliance
Modern electrical codes mandate specialized safety devices to protect against two common electrical hazards: ground faults and arc faults. Ground Fault Circuit Interrupters (GFCIs) prevent severe electrical shock, while Arc Fault Circuit Interrupters (AFCIs) prevent fires. A key part of any home electrical inspection checklist is verifying that these devices are installed correctly and are fully functional where required.
Inspectors test GFCIs and AFCIs to ensure they trip when a fault is detected. GFCIs are required in "wet" locations like kitchens, bathrooms, garages, and outdoor outlets. AFCIs are mandated for circuits in living areas such as bedrooms, living rooms, and hallways to protect against arcing caused by damaged wires, a common cause of electrical fires.
Key Inspection Points and Common Issues
Professionals verify compliance with the latest National Electrical Code (NEC) standards, which are regularly updated. Many older homes lack this crucial protection, leaving residents vulnerable. An inspector will identify these omissions and recommend necessary upgrades.
Common problems discovered during a GFCI/AFCI inspection include:
- Missing Protection: Outlets in bathrooms, kitchens, or outdoors without GFCI protection, or living room and bedroom circuits lacking AFCI protection.
- Faulty Devices: Existing GFCI or AFCI outlets or breakers that fail to trip during a test, rendering them ineffective.
- Improper Installation: A GFCI outlet that is not wired correctly may not provide protection to other outlets "downstream" on the same circuit.
Pro Tip: Monthly testing is key. Press the "TEST" button on each GFCI outlet. The "RESET" button should pop out, and power should be cut. If it doesn't, the device is faulty and needs immediate replacement.
Actionable Tips for Homeowners
You can perform basic checks to ensure your home's safety devices are operational, but a professional inspection is needed for full compliance verification. Learn more about the specifics of what a comprehensive electrical safety inspection covers to understand the full scope.
- Test Monthly: Make it a habit to test every GFCI and AFCI device in your home once a month to ensure they are working properly.
- Map Your Protection: Know which outlets are protected by which GFCI. Sometimes one GFCI outlet protects several others on the same circuit.
- Upgrade When Necessary: If you have an older home, prioritize adding GFCI and AFCI protection during any electrical work or renovation.
8. Service Entrance Size and Upgrade Necessity
The service entrance is the point where the main power line from the utility company connects to your home, determining the total amount of electricity available. This part of a home electrical inspection checklist is crucial because it dictates whether your system can safely support modern electrical demands. Inspectors verify the size of this service, as older homes may have outdated 60-amp systems, while modern households often require at least 100 to 200 amps.
An undersized service entrance can lead to overloaded circuits, frequently tripped breakers, and even create a significant fire risk. An inspector will assess your current and potential electrical load, considering major appliances like HVAC systems, electric vehicles, and modern kitchen equipment, to determine if your service is adequate and meets current electrical codes.
Key Inspection Points and Common Issues
Professionals look beyond just the amperage rating; they evaluate the condition of the service mast, weatherhead, and service entrance conductors for physical damage or deterioration. A common issue is finding a home with a 100-amp service struggling to support new, high-demand appliances, leading to constant power issues.
Common problems discovered during a service entrance inspection include:
- Inadequate Amperage: A 1970s home with its original 60-amp service cannot safely power a modern kitchen, central air, and an EV charger.
- Overloaded System: Adding a hot tub or a new air conditioner to a maxed-out 100-amp service without upgrading can cause dangerous overheating.
- Code Violations: Improper clearances around the service entrance wires or mast can pose safety hazards and will be flagged during an inspection.
Pro Tip: Your main breaker, located at the top of your electrical panel, will have its amperage rating stamped on the handle (e.g., "100" or "200"). This number indicates your home's total service capacity.
Actionable Tips for Homeowners
If your electrical inspection reveals that your current service entrance is insufficient for your home's needs, consider exploring a comprehensive guide to a home electrical panel upgrade to understand the process. Proper planning is essential for a safe and effective update.
- Calculate Your Load: Before adding any major electrical appliances, work with an electrician to calculate your home's total electrical load to see if an upgrade is necessary.
- Ensure Proper Clearances: Maintain a minimum of three feet of clear space around your service entrance equipment and ensure tree branches are trimmed away from overhead lines.
- Get Permits: Any work to upgrade your service entrance is a major project that requires permits and inspections from your local building authority.
9. Exposed and Improperly Installed Wiring
Properly installed and protected wiring is fundamental to a safe electrical system. Throughout your home, wires should be shielded within walls, conduit, or approved sheathing to prevent damage. A key part of any home electrical inspection checklist is identifying any wiring that is exposed, damaged, or installed in a way that violates safety codes.
Inspectors meticulously scan attics, basements, crawl spaces, and garages for these hazards. Exposed wires present a direct shock risk, while damaged insulation can lead to arcing and dangerous fires. Improperly routed or unsupported wiring can be easily damaged by physical contact, pests, or environmental factors, compromising the entire circuit.
Key Inspection Points and Common Issues
Professionals look for violations of the National Electrical Code (NEC), such as those outlined in Articles 300 and 334. They are trained to spot makeshift solutions and hazardous shortcuts that can have devastating consequences.
Common problems discovered during a wiring inspection include:
- Unsupported Runs: Wires draped across ceiling joists or beams in a basement without being properly secured or protected by conduit.
- Damaged Insulation: Wires in an attic with chewed, cracked, or melted insulation, exposing the live copper conductor to flammable materials.
- Permanent Extension Cord Use: Using an extension cord as a permanent substitute for a properly installed outlet and circuit, creating a major fire risk.
- Improper Routing: Electrical wiring run alongside or touching plumbing pipes or ductwork, which can lead to damage from condensation or abrasion.
Pro Tip: If you see any exposed copper, frayed insulation, or wires that are not enclosed in a junction box or attached to a device, treat it as a live wire. Do not touch it, and call a licensed electrician immediately.
Actionable Tips for Homeowners
You can perform a visual check for obvious wiring issues in accessible areas of your home.
- Check Basements and Attics: Look for any cables that are hanging loosely, draped over pipes, or lying on the floor. All wiring should be neatly secured and protected.
- Photograph Problem Areas: If you find suspicious wiring, take clear photos from a safe distance to show to an electrician.
- Eliminate Permanent Extension Cords: Identify any areas where extension cords are used long-term and plan to have a licensed electrician install a permanent outlet.
10. Presence of Double-Tapped and Tandem Breakers
During a home electrical inspection, an electrician will carefully examine the breaker box for two related but distinct conditions: double-tapped breakers and tandem breakers. A double-tapped breaker is a common and dangerous code violation where two wires are connected to a single terminal designed for only one. This improper connection can lead to overheating, arcing, and a serious fire hazard.
Conversely, a tandem breaker, sometimes called a twin or slim breaker, is a code-approved device that fits two separate circuits into a single slot in the panel. These are safe only when used in a panel specifically designed and labeled to accept them. A key part of the home electrical inspection checklist is distinguishing between dangerous double-tapping and the proper use of tandem breakers.
Key Inspection Points and Common Issues
An inspector can quickly identify these issues by removing the panel cover. They will look for breakers with more than one wire under a single screw, unless the breaker is explicitly rated for it (which is rare). They will also cross-reference the panel's wiring diagram to see if tandem breakers are permitted in the installed slots.
Common problems discovered during a panel inspection include:
- Illegal Double-Tapping: A kitchen and dining room circuit are improperly wired together onto a single 15-amp breaker, creating a loose connection.
- Misused Tandem Breakers: A tandem breaker is installed in a panel slot that is not approved for its use, violating the panel's design and creating a hazard.
- Overloaded Circuits: Double-tapping is often a sign that a panel is out of space, indicating the home's electrical system may be overloaded and in need of an upgrade.
Pro Tip: The presence of double-tapped breakers is a red flag that unlicensed electrical work may have been performed in the past. Always have this condition corrected by a licensed professional.
Actionable Tips for Homeowners
While you should never work inside your panel, you can be aware of the signs and take appropriate steps.
- Document Suspected Issues: If you notice multiple wires entering a single breaker or your home inspection report flags this, take a clear photo for your electrician.
- Plan for Correction: Correcting a double-tap might involve adding a new breaker if space allows, using a proper tandem breaker (if approved), or even upgrading the entire panel.
- Consult the Panel Legend: The diagram inside your panel door often indicates which slots can accept tandem breakers. An electrician can confirm this for you.
10-Point Home Electrical Inspection Comparison
| Item | Implementation complexity | Resource requirements | Expected outcomes | Ideal use cases | Key advantages |
|---|---|---|---|---|---|
| Panel and Breaker Box Inspection | Medium — internal panel access and visual/testing | Licensed electrician for repairs, basic test tools; moderate cost if replacement needed | Identifies fire/capacity hazards, need for upgrades | Pre-purchase inspection, signs of panel age or overheating | Catches major hazards, ensures capacity and labeling |
| Outlet and Switch Condition Assessment | Low — visual and simple functional tests | Outlet/GFCI tester, multimeter; minimal cost | Detects shock/fire risks, loose or ungrounded receptacles | Routine safety checks, turnover inspections, visible issues | Quick, non-invasive fixes; improves occupant safety |
| Grounding and Bonding System Verification | Medium — requires continuity testing and exterior checks | Continuity tester, access to grounding rod, electrician expertise | Verifies safe fault path, surge protection readiness | After lightning events, older homes, surge protector install | Prevents shock, protects equipment, relatively inexpensive to verify |
| Wire Gauge and Amperage Matching | Medium — visual inspection, some probing | Multimeter, labeling, possible electrician for concealed checks; may be costly to correct | Identifies undersized wiring and mismatch risks | When breakers trip frequently, during renovations or purchase | Prevents overheating and fire, aligns with NEC sizing |
| Knob and Tube Wiring Identification | Low to medium — visual ID; concealed detection may be hard | Visual inspection, attic/basement access; major rewiring costly if present | Confirms presence of hazardous obsolete wiring | Pre-1950 homes, historic properties, insurance checks | Clear justification for replacement, improves resale and safety |
| Aluminum Wiring Assessment | Medium — visual ID and connection inspection | Visual inspection, electrician evaluation, anti-oxidant treatment or pigtailing; potential replacement cost | Identifies higher fire-risk connections, informs mitigation plan | Homes from 1965–1973, when aluminum suspected | Targeted retrofits possible; allows prioritized upgrades |
| GFCI and AFCI Protection Compliance | Low to medium — outlet and breaker testing | GFCI/AFCI testers, replacement devices; electrician for circuit upgrades | Ensures rapid shutdown on faults, reduces electrocution/fire risk | Required by code in bathrooms, kitchens, bedrooms; older homes lacking protection | High safety impact, relatively low installation cost |
| Service Entrance Size and Upgrade Necessity | High — may require utility coordination and major work | Utility involvement, permits, electrician/contractor, significant cost | Determines overall capacity; enables modern appliances | When adding major loads, older homes with low amp service | Enables increased capacity and code compliance |
| Exposed and Improperly Installed Wiring | Low to medium — visual identification, may need invasive fixes | Visual inspection, electrician for repairs, conduit materials if needed | Removes obvious shock/fire hazards, schedules repairs | Basements, attics, renovations, visible damage | Prevents deterioration and immediate hazards, improves appearance |
| Presence of Double-Tapped and Tandem Breakers | Low — panel interior visual check | Panel access, electrician for corrective work; modest cost per fix | Identifies code violations and overload risks | Panel inspections, when circuits behave erratically | Easy to detect, straightforward corrective options |
From Checklist to Action: Securing Your Home’s Electrical Health
Navigating the complexities of your home's electrical system can feel overwhelming, but by working through this detailed guide, you have taken a crucial first step. You are now equipped with the knowledge to identify potential hazards that often go unnoticed, transforming abstract electrical concepts into tangible, observable checkpoints. This is more than just a list; it is a roadmap to empowerment, allowing you to proactively safeguard your family and your most significant investment.
You have learned to look beyond the simple function of a light switch and assess the health of your entire electrical infrastructure. From scrutinizing the main service panel for dangerous double-tapped breakers to identifying the subtle yet critical differences between copper and outdated aluminum wiring, your awareness has been sharpened. Recognizing the importance of GFCI and AFCI protection in moisture-prone and living areas, respectively, is no longer a mystery. You can now spot the tell-tale signs of an undersized service entrance struggling to keep up with modern demands or the immediate danger posed by exposed, frayed wiring.
Key Takeaways for Proactive Homeowners
This home electrical inspection checklist is designed to build your confidence as a homeowner. Remember these core principles as you move forward:
- Awareness is Your First Line of Defense: Simply knowing what to look for, such as an overcrowded breaker box or ungrounded outlets, gives you a powerful advantage in preventing electrical issues before they escalate.
- Age is a Critical Factor: Systems featuring knob and tube wiring, aluminum wiring, or panels over 25-30 years old demand immediate professional evaluation. These are not just signs of age; they are significant safety risks.
- Compliance Equals Safety: The consistent presence of GFCI and AFCI protection is not just about meeting building codes. It's about implementing modern safety technology designed to prevent electrocution and arc-fault fires.
The Bridge from Knowledge to Professional Action
The ultimate value of this checklist lies in its ability to bridge the gap between your observations and the necessary professional intervention. Electrical work is intricate, code-dependent, and carries inherent dangers that make it unsuitable for DIY attempts. The risks of fire, electrocution, or significant property damage are far too great.
If your self-inspection has raised even one red flag, whether it is a buzzing outlet, a frequently tripping breaker, or the discovery of outdated wiring, your next and most important step is to contact a licensed and insured electrician. A professional will not only confirm your findings but will also use specialized diagnostic tools to uncover underlying issues you cannot see. They can perform a comprehensive safety inspection, provide a detailed report, and execute the precise repairs or upgrades needed to ensure your home is both safe and compliant with current electrical codes. By taking this final step, you transition from a concerned homeowner to a proactive protector of your home’s well-being, ensuring lasting peace of mind.
For homeowners in Sarasota, Port Charlotte, Cape Coral, Fort Myers, and the greater Tampa Bay area, taking that next step is simple. The certified experts at Heatwave Air Conditioning, Plumbing, & Electric specialize in comprehensive electrical safety inspections and services. Don't let uncertainty linger; contact us today for a professional evaluation and ensure your home's electrical system is safe and reliable.