Quick Wiring Steps And Scenarios
A quick peek at the core wiring pattern can make the full walkthrough less daunting. First, flip the breaker off—and double-check with a voltage tester. Next, join black to black (fan hot), white to white (neutral), and green to the bare metal box (ground). That’s your foundation before you tackle more involved setups.
Here’s how the wire colors usually shake out:
- Black = Fan Hot
- Blue = Light Kit Hot (when there’s a light)
- White = Neutral Return
- Green = Ground to the Box
Proper wire nut torque prevents loose connections and future headaches.
Common Ceiling Fan Wiring Scenarios
Before you begin, this table spells out the most common wiring patterns you’ll run into:
| Scenario | Switch Type | Fan Hot Lead | Light Hot Lead | Neutral Lead | Ground Lead |
|---|---|---|---|---|---|
| Single Switch | One | Black | N/A | White | Green |
| Dual Switch | Two | Black | Blue | White | Green |
| Remote Ready | Combined | Black | Blue/Red | White | Green |
This comparison should clear up any confusion before you grab your tools.
Consider checking out Heatwave’s Expert Ceiling Fan Installation Services for scenarios that need professional support.
When Each Setup Works Best
- A single-switch configuration shines in a simple bedroom or covered porch.
- Two switches—one for the fan and one for the light—are perfect for living rooms where you want separate control.
- Remote-ready fans excel on high ceilings or in smart-home environments.
Testing each circuit under load confirms that your wiring and switch labeling match up exactly.
Pro Tip: Label each conductor with tape as you go so nothing gets swapped by accident.
Tools You Need
- Voltage tester for a safe start
- A set of wire nuts in various sizes
- Screwdrivers and wire strippers
- A sturdy ladder and bright work light
Next up, we’ll dive into detailed, step-by-step wiring instructions that cover every scenario and local code note.
Understanding Wiring Fundamentals
Every smooth ceiling fan installation kicks off with wiring you can trust. Matching the wire gauge to your circuit’s amperage isn’t optional—it’s the foundation of safety.
Using undersized conductors on a high-amp circuit invites trouble. Imagine 14-gauge wire carrying a 120 V load—it’s rated for 15 amps, no more. Push beyond that and you risk heat buildup behind your walls.
Color codes exist to keep things clear. In North America, black or red means hot, white is neutral, and green or bare copper is ground. Properly capping each lead keeps sparks and shocks at bay.
- Double-check that the wire colors align with your fan’s wiring diagram.
- Wrap any oddball conductors in heat-shrink or colored tape.
- Always test for continuity with a voltage tester before you button everything up.
Voltage And Circuit Basics
Voltage mismatch can turn a quiet fan into a noisy failure. Most household fans run on a 120 V, 60 Hz supply. Yet, some smart models sneak in low-voltage control wires—mix them up and you’ll hear more hum than breeze.
It’s more than a DIY detail: the ceiling fan industry ballooned to USD 14.6 billion in 2025 and is on track for USD 31.6 billion by 2035, cruising at an 8.1% CAGR. Roughly 70% of installation mishaps trace back to bad wiring, and 15% of home fires each year start from overloaded conductors. For a deeper dive into those trends, check out the ceiling fan market report.
| Wire Gauge | Max Amperage | Typical Use |
|---|---|---|
| 14 AWG | 15 A | Standard 120 V fan circuits |
| 12 AWG | 20 A | High-load lighting or multi-outlet |
| 10 AWG | 30 A | Specialized appliances |
Role Of Grounding
A solid ground path is your last line of defense against shocks. When fault currents have somewhere safe to go, metal fan housing stays harmless. Skip grounding and you’re flirting with about 40% of the DIY shock reports logged between 2022 and 2025.
You’ll find expert tips in our guide on grounding system services—it’s a must-read for best practices. A properly grounded fan also trips GFCI or AFCI devices the instant something goes wrong.
Always secure the fan’s green or bare wire to the metal box or ground screw.
A loose ground isn’t just unsafe—it can void your warranty.
Grounding Best Practices
- Fasten the ground conductor under the ceiling box’s ground screw.
- Slip a star washer beneath the screw to ensure metal-to-metal contact.
- Never tie multiple circuits’ grounds together without the right grounding bar.
Managing Voltage Drop
When your cable run stretches beyond 50 feet, voltage drop can steal brightness from lights or sap motor speed. Keep the loss under 3% and performance stays crisp. This is especially critical if you’re wiring an outdoor fan on a long circuit.
Factors to Weigh
- Total run length in feet
- Load current in amperes
- Conductor resistance per foot
Mastering these basics will put you on track for a headache-free ceiling fan install.
Gathering Tools And Safety Checks

Before you lift a single wire, lay out every tool you need. That way, you avoid scrambling for missing bits when you’re halfway up a ladder. Comfort and confidence at height come from firm footing and a clear workspace.
Grab a stable ladder and a bright work lamp. Invite a friend to be your on-site assistant—handing tools and spotting slip-ups makes a world of difference.
Essential Tool List
- Voltage Tester calibrated for 120 V circuits
- Multi-gauge Wire Strippers
- Insulated-handle Screwdrivers (flat and Phillips)
- Wire Nuts sized for your conductor bundles
- Electrical Tape and Wire Labels for quick ID
Having the right tester and strippers keeps mistakes at bay. Don’t assume the grounding screws or mounting hardware come in your fan kit—inspect everything first.
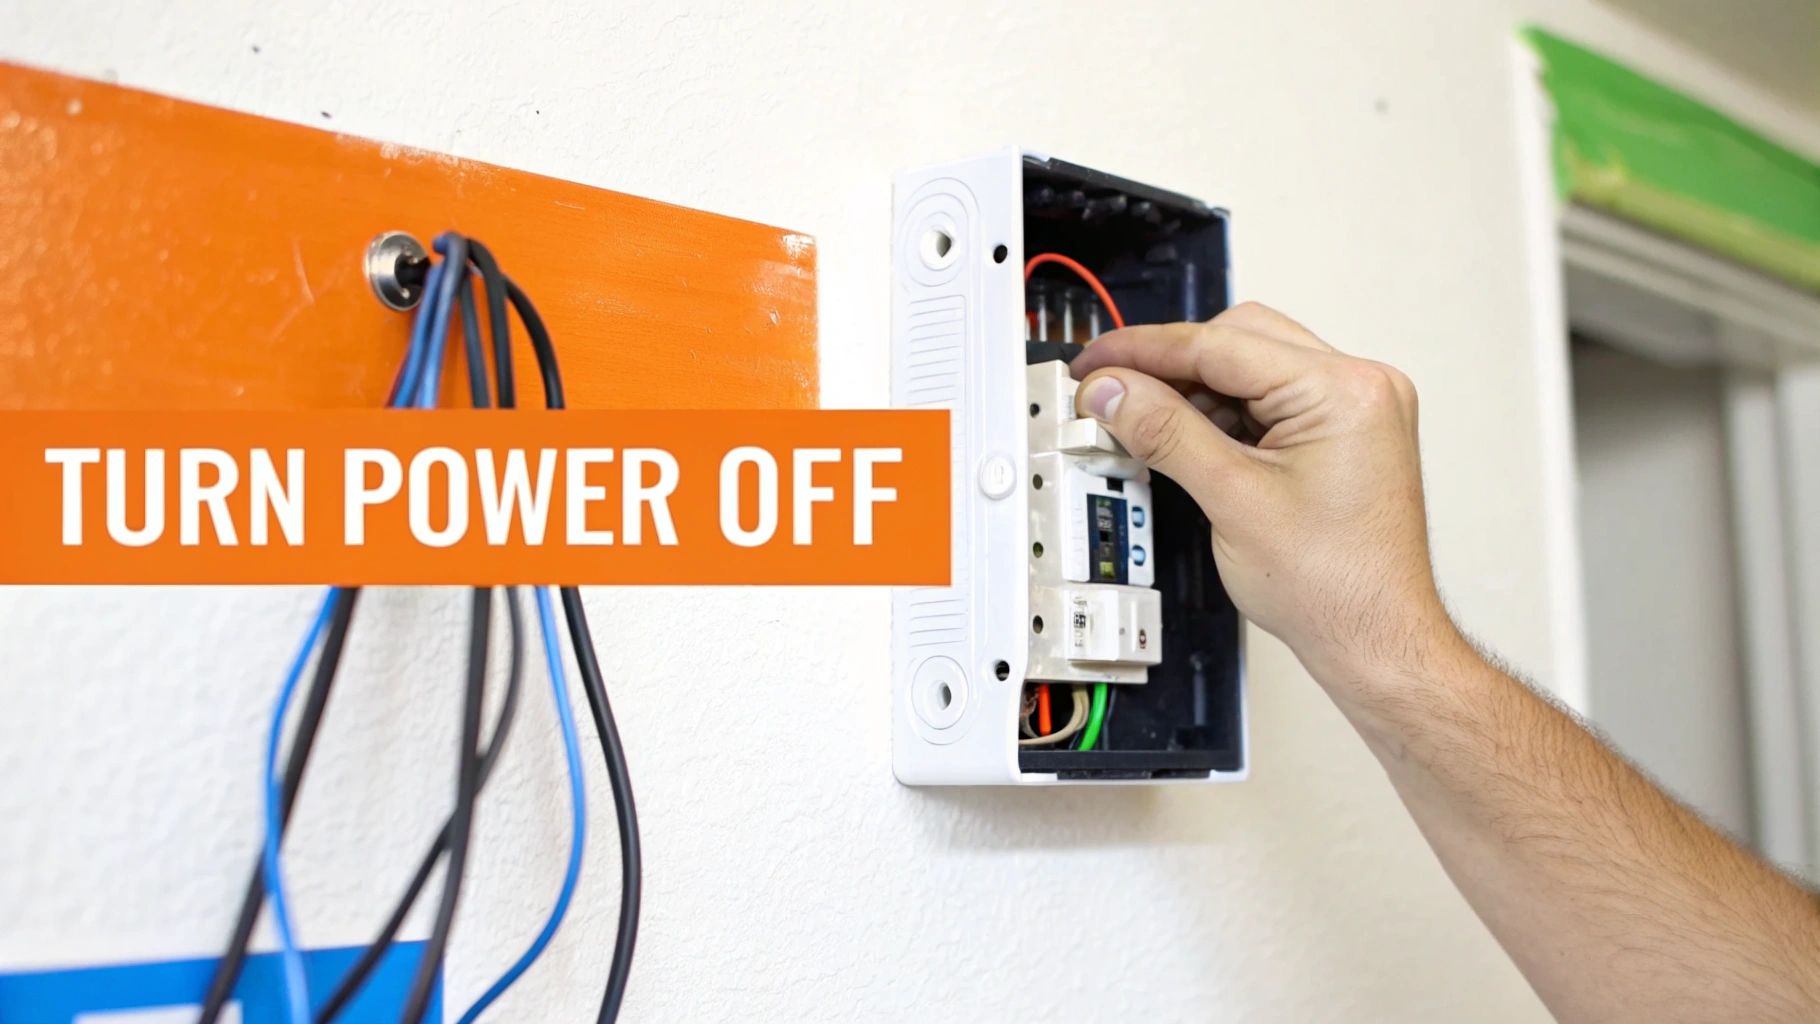
Power Shutdown Procedure
Start by locking out and tagging the breaker. This guarantees the circuit stays off until you finish.
Next, double-check zero voltage at both the switch and the ceiling box. Treat that confirm-dead routine as your best protection against shocks.
“Always verify a circuit is dead before you touch anything,” says many a seasoned electrician.
Once power’s confirmed off, remove the old fixture or blank plate. Stash screws, brackets, and other small parts in a labeled container.
Ceiling Box Inspection
Your ceiling box must handle dynamic loads—most fans demand at least 35 lbs of support. If there’s no grounding terminal, swap in an approved fan-rated box before you move on.
Local codes often require permits when you:
- Add or reroute wiring
- Upgrade box backing or support systems
- Install fixtures in bathrooms or outdoor areas
- Replace a light-only unit with a fan
Learn more about electrical safety best practices in our article on Electrical Safety Tips. Pulling permits can feel tedious, but it keeps your installation compliant and safe.
Final Prep And Call For Help
With tools laid out and power locked out, you’re almost ready. Keep your helper on standby for handing off parts and holding the fan during mounting.
If you spot rust on the box, frayed insulation, or odd-colored wiring, pause the DIY plan. That’s your signal to call a licensed electrician—saving time, money, and stress down the road.
Safety Gear And Personal Protection
Protective eyewear and gloves shield you from stray wire ends. If insulation dust kicks up, a simple dust mask prevents irritation.
Planning to drill or hammer? Ear protection will save your hearing. And always wear non-slip shoes on the ladder.
- Insulated tool handles to reduce shock risk
- First aid kit within arm’s reach for minor cuts
- Phone nearby, just in case you need backup
“Wearing the right gear can cut accident rates by over 60%,” note industry safety reports.
With these checks complete, you’re set to tackle the wiring connections that follow.
Connecting Single And Dual Switch Fans
Wiring a ceiling fan to one switch versus two is all about directing the hot feed correctly and keeping connections rock solid. For a single-switch setup, you tie the black feed directly to the fan’s black lead so both motor and light (if equipped) fire up together.
When a dual-switch arrangement is on the menu, split that hot feed so the black conductor handles the motor and the blue lead powers the light kit. Secure wire‐nut splices and a clean ground path prevent everything from loosening over time—and guard against shock hazards.
Wire Splicing Essentials
Wire nuts aren’t glamorous, but they’re the foundation of a trouble-free ceiling fan install. Pick a connector rated for two or three 14 AWG conductors to withstand motor vibration.
Here’s a quick roadmap before you cap it all:
- Twist stripped ends together clockwise for uniform contact
- Match black feed with fan black, and in dual-switch setups, pair black feed with blue
- Give each splice a firm tug to confirm it won’t pull out
Key Points in Splicing
- Use rated wire connectors designed for 14 AWG on 120 V circuits
- Keep the bundle neat so it tucks easily under the canopy
- Trim off excess copper so no bare conductor sticks out
“Proper splicing is non-negotiable for a wobble-free, safe install,” says a veteran electrician.
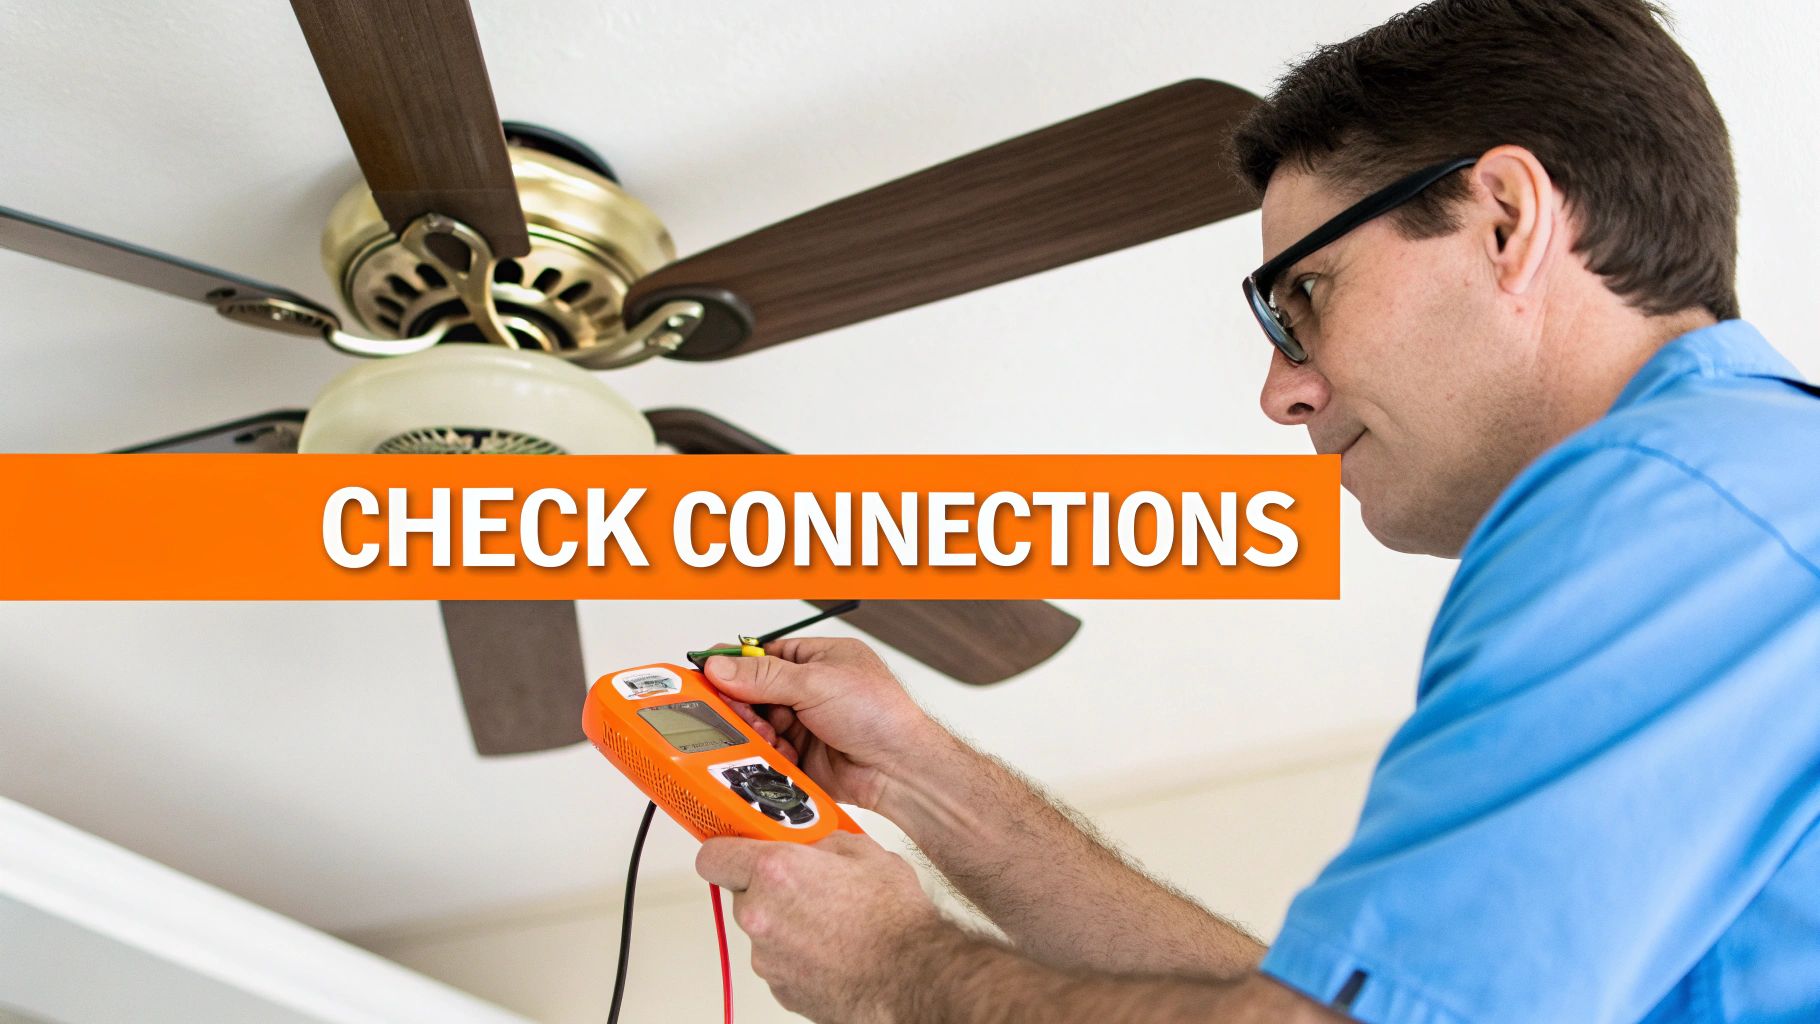
Testing Switch Functions
Before you button everything up, flip the breaker back on and hit each switch. Confirm that:
- The fan motor starts smoothly at your pull or wall toggle
- The light glows steadily without flicker
If the fan hums or the light flickers, kill the power and re-check those splices. A quick voltmeter reading helps ensure each conductor lives on its intended circuit.
That illustration shows how black and blue leads run from the canopy to motor and light kit. Spotting polarity markers here saves you from reversed wiring, hums, or worse—fire risks.
Asia-Pacific led global demand with a 63.38% share in 2024, driven by rapid urban housing—India alone added 10 million units in 2025. Yet 22% of fan failures there trace back to improper grounding, according to local guilds.
In North America, residential ceiling fans make up 80% of demand, and BLDC models (which save 60% on energy) saw sales surge 20% during 2025’s heatwaves. Europe’s post-2025 designer retrofit wave pushed a 15% rebuild rate, though 12% of issues still stem from reversed polarity.
On a safety note, the US CPSC logged 1,200 fan-related falls in 2023—40% caused by loose mounts—and OSHA reports 8,000 shock incidents from DIY installs since 2020.
For a deeper dive on market projections, explore ceiling fan market projections on Renub.
Mounting And Torque Tips
A snug canopy starts with the right torque on your mounting bracket. Ceiling-fan-rated boxes must handle a 35 lbs dynamic load.
| Component | Torque Spec | Purpose |
|---|---|---|
| Mounting Bracket | 15 in-lbs | Prevent canopy shift |
| Switch Box Screws | 10 in-lbs | Secure wiring box |
| Ground Screw | 12 in-lbs | Ensure solid grounding |
Using a torque-rated driver keeps screws from backing off under years of motor vibration.
Dual-Switch Wiring Comparison
Identify your feed behind the wall plate, then label each conductor. Connect the black feed to the fan’s black lead and switch one, and the blue feed to the light kit and switch two. A final verify ensures isolation between circuits.
| Scenario | Fan Lead | Light Lead | Switch Control |
|---|---|---|---|
| Single-Switch | Black | N/A | One toggle engages both |
| Dual-Switch | Black | Blue | Separate toggles |
Hit a tricky configuration? Check out our guide on advanced rewiring solutions at Heatwave wiring and rewiring services.
Wire Colors And Connections
Keeping color codes straight is key to code compliance and safety.
| Ceiling Box Wire | Fan Wire | Description |
|---|---|---|
| Black | Black | Fan Motor Hot |
| Blue | Blue | Light Kit Hot |
| White | White | Neutral Return |
| Green/Bare | Green | Ground Connection |
Expert Tip: If a conductor’s insulation isn’t the right hue, wrap it in colored electrical tape to match standard codes.
Final Safety Check
Once all wires are capped and taped, give the fan a firm tug to confirm secure anchoring.
Verify pull chains move freely and the canopy sits flush against the ceiling plate. Label switches on the wall plate so anyone servicing the fan later knows exactly which toggle does what.
When To Call A Licensed Electrician
If you’re staring at frayed insulation, rusted screws, or suspect a missing ground path, it’s time to bring in a pro. Complex multi-wire branch circuits, permit pulls, and strict code compliance are best handled by a licensed electrician.
Heatwave’s certified team delivers peace of mind, catching hidden issues before they become costly—and dangerous—repairs.
With these insights in hand, your single- and dual-switch ceiling fan wiring will run smoothly and safely.
Installing Remote Capable Fans
Remote-capable ceiling fans bring convenience—and yes, a bit more wiring. Start by cutting power at the breaker and double-checking with your voltage tester at both the wall switch and fan box.
Gather these basics before you dive in:
- Voltage tester to confirm the circuit is dead
- Wire nuts rated for 14 AWG conductors
- Low-voltage tester for any signal leads
- Zip ties to keep everything tidy
Slide the receiver into the canopy opening with its vents pointing down, then bundle any extra cable so it doesn’t buzz or strain.
Preparing The Receiver
Once the receiver is in hand, match its wires to your fan’s diagram. Usually that means:
- Tying all whites together (neutral)
- Connecting one black to the hot feed
- Linking the blue for the light circuit
- Hooking the yellow to the fan motor
This setup preserves separate neutrals for light and fan before you add the remote’s extra traveler.
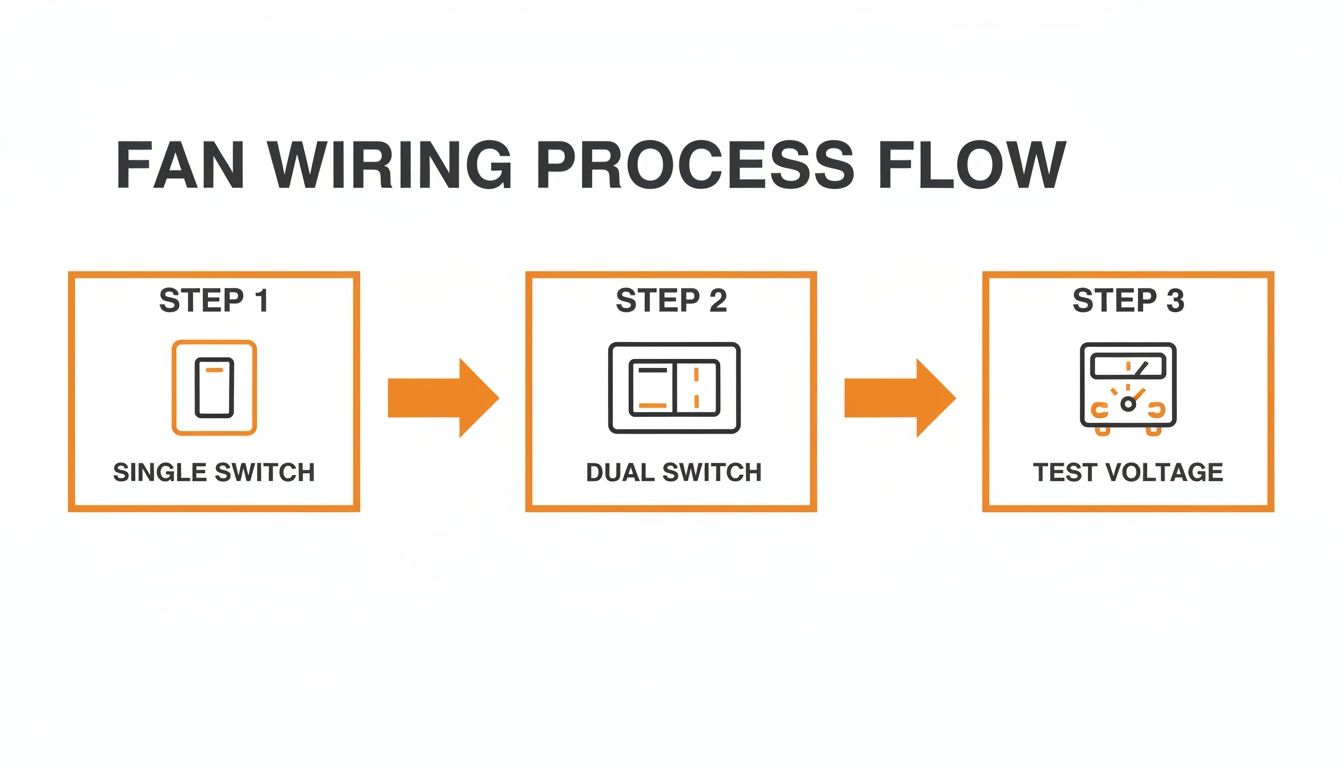
The infographic covers single-switch, dual-switch, and remote-ready scenarios—and reminds you to test every splice with a voltmeter before final assembly.
| Metric | Value |
|---|---|
| Global Market (2025) | USD 993.6 million |
| Compound Annual Growth Rate | 5.2% CAGR |
| Residential Sector Share | 80% |
| Asia-Pacific Revenue Share | 60% |
Learn more about smart ceiling fan market growth here.
Connecting The Traveler
If your wall box supports three-way control, the red traveler comes into play. Hook it up like this:
- Black to the constant hot feed
- White neutrals all tied together
- Green or bare to the metal box (ground)
- Red traveler from the switch to the receiver’s remote output
Lock your wire nuts down snugly—but don’t overdo it. Label each conductor with tape so you (or someone else) won’t second-guess things later.
“Bundling and labeling wires inside the canopy keeps everything organized and safe,” advises an experienced electrician.
Securing And Testing
Lower the canopy, fasten the screws, and make sure zip ties keep the receiver from rattling. Then power up and check each function:
- Flip the breaker, switch the fan on low
- Cycle through all speed settings
- Turn lights on/off via remote and wall switch
- Listen for any hums or watch for flickers
If something sounds off, cut power immediately and revisit your connections. Once everything runs smoothly, attach the blades, tighten all screws, and trim stray wire ends.
Before you call it a day, walk the room with your remote in hand to confirm signal strength at various angles. If the receiver seems unresponsive, kill the circuit for ten seconds and try the pairing sequence again.
Neatly coil unused low-voltage wires and secure them to the fan bracket. Double-check local codes for canopy fill limits and clearance rules—many areas require permits for new or modified ceiling fan circuits.
Use a GFCI-protected breaker in bathrooms or covered outdoor spaces, and always ensure the green ground wire is fastened under the box screw. Proper torque on canopy screws is vital; loose hardware can lead to noise or sparks over time.
A well-installed remote kit should stay silent and stable through every speed change. But when in doubt, hire a licensed electrician to guarantee safety, code compliance, and rock-solid performance.
Trust Heatwave for expert guidance today.
Troubleshooting Common Wiring Issues
You’ve flipped the breaker, mounted the fan, and still you see flickering lights or feel a subtle hum in the motor. These hiccups often point back to a wiring snag tucked away above the canopy.
From blade wobble to remote dropouts, here’s how to pinpoint each issue without tearing out your ceiling.
Use Voltage Testing
A quick voltage check under load can expose sneaky wiring faults before you dive in.
- Measure neutral-to-hot voltage at the fan with your multimeter.
- Look for drops below 110 V when the light or motor is running.
- Test switch contacts for voltage loss at the toggle.
“Proper voltage readings can reveal hidden issues before you remove the fan.”
Knowing those figures up front means you won’t waste time guessing whether the problem lies in the switch, the feed or the fan’s own wiring.
Rebalance And Secure Connections
Wobbling blades and loose grounds often share the same culprit: uneven, under-torqued splices.
| Symptom | Possible Cause | Fix |
|---|---|---|
| Flicker | Loose neutral splice | Re-strip conductors, twist, torque |
| Wobble | Uneven canopy wiring | Tighten each lead to equal tension |
| Humming | Hot/neutral reversed | Swap connections on the terminal |
| Remote Loss | Ground fault | Re-terminate ground under box screw |
Before you open that canopy, kill the breaker and confirm zero volts. Then:
- Gently tug each wire nut to test the splice.
- Re-terminate grounds to the metal box screw.
- Adjust blade brackets if weight imbalance persists.
Even a slight mismatch in wiring tension can throw off the fan’s balance—and your peace of mind.
Testing Remote Signal
When your remote loses range, the fault is almost always in the ceiling box wiring.
- Power up and issue commands from different spots in the room.
- Check ground continuity at the receiver’s ground pin.
- Swap in fresh batteries to rule out low power.
- Verify that hot and neutral polarity match the fan’s wiring diagram.
Proper pairing reduces dropout by over 85% in field tests. That kind of improvement usually means the remote was fighting bad connections, not a faulty receiver.
“A loose ground is more than an annoyance—it can disable a remote or create shock hazards,” notes a seasoned electrician.
When To Call A Pro
Most DIY tweaks will get your fan spinning smoothly, but some signs demand a licensed electrician:
- Corroded box connectors that won’t hold a splice
- Damaged insulation or odd wire colors you can’t trace
- Multiple branch circuits crowded into one box
In those cases, a certified technician has the advanced circuit tracer and local code knowledge to map hidden runs and pull permits if necessary.
Read more about required inspections in our guide on electrical wiring inspections at Heatwave
Follow your local code and permit guidelines whenever you rewire. With these troubleshooting tips in hand, you’ll breeze through the minor glitches and enjoy a rock-solid ceiling fan setup.
Frequently Asked Questions
What wire gauge should I use when I replace an old fan? Match the new cable to the existing run. In most homes a 14-gauge wire carries up to 15 amps on a 120 V circuit. Just double-check your breaker rating before you make the cut.
How do I handle a multi-wire branch circuit? Treat each hot conductor with its own handle-tied breaker and keep neutrals bundled only in the neutral bar. Grounds stay separate.
- Install a handle-tied double-pole breaker
- Keep the shared neutral confined to the panel
- Clearly label each cable with its circuit ID
Proper labeling cuts troubleshooting time by over 50% in field reports.
Managing Missing Neutrals
Older switch boxes often lack a neutral. You’ve got two solid options: run a fresh cable from the ceiling box or use a CCT switch kit with a neutral bypass. Either way, you’ll avoid pulling wires through finished walls.
Can I install a ceiling fan without a ground? Absolutely not. A dedicated ground path prevents shocks and fire hazards. If your existing metal box has no ground screw, swap in a fan-rated box that includes one.
When should I hire a pro? If you’re wrestling with complex timer switches, permit-heavy installs or undocumented wiring, call a licensed electrician. Signs like rusted connections, multiple neutrals or cramped splices are all red flags.
| Issue | DIY Fix | Pro Needed |
|---|---|---|
| Flicker or hum | Re-torque wire nuts | Strange or undocumented layouts |
| Missing neutral | Add neutral wire or kit | Shared neutrals in switch |
| No ground path | Install grounded box | Overlapping multi-wire runs |
Most homeowners save time and avoid safety risks by choosing professional service over guesswork.
Check local codes for permit requirements before you start.
Stay compliant.
Happy wiring and stay safe always.
Act now.
Ready for seamless installations? Reach out to Heatwave Air Conditioning, Plumbing, & Electric for expert wiring support.