
You notice a faint stain on the ceiling below the bathroom. Or the shower smells musty even after a deep clean. Maybe a floor tile near the drain feels a little loose, but nothing looks dramatic enough to call an emergency.
That's how a leaky shower pan usually starts, often unnoticed.
In Florida, quiet leaks rarely stay small for long. Research on compromised shower pans notes that the state's humid coastal conditions in places like Tampa Bay, Sarasota, and Fort Myers can speed up mold growth and structural deterioration, and delayed repairs can end up costing 3 to 5 times more than early action in less humid regions, which is why fast response matters so much in this climate (Florida shower pan risk factors).
A hidden shower leak can fool homeowners for weeks. The shower still drains. The fixtures still work. You wipe up a little moisture near the baseboard and assume someone stepped out with wet feet.
Then the signs start lining up.
The paint on the wall outside the shower begins to peel. The bathroom keeps smelling earthy. A nearby closet feels damp. If the shower sits over a first floor room, the ceiling below may show a yellow or brown ring. At that point, you're not dealing with a nuisance. You're dealing with water getting where it should never go.
In a drier climate, some leaks stay hidden longer before they create obvious damage. In Florida, warm air and constant humidity give moisture a head start. Wet framing, subflooring, and the dark cavity below a shower become a prime place for mold and decay.
Practical rule: If you suspect a shower pan leak, treat it like a time-sensitive problem, not a cosmetic one.
That doesn't mean panic. It means move quickly, verify the source, and avoid guessing. Homeowners who aren't sure who to trust for the inspection or repair should start by learning how to find a good plumber. The right diagnosis matters more than the first quick patch.
A failed pan isn't typically discovered because water is pouring out of the shower. It's discovered because one of these everyday clues keeps coming back:
A leaky shower pan is fixable. What raises the stakes is delay. In Florida homes, delay gives moisture time to spread into framing, subfloors, insulation, and drywall.
A shower pan sits under the tile or finished shower floor. Think of it as a hidden waterproof basin whose job is to catch water that gets past the tile surface and send it safely to the drain.
When it's built correctly, you never notice it. When it fails, water escapes below the visible shower floor and starts soaking materials that were never meant to stay wet.
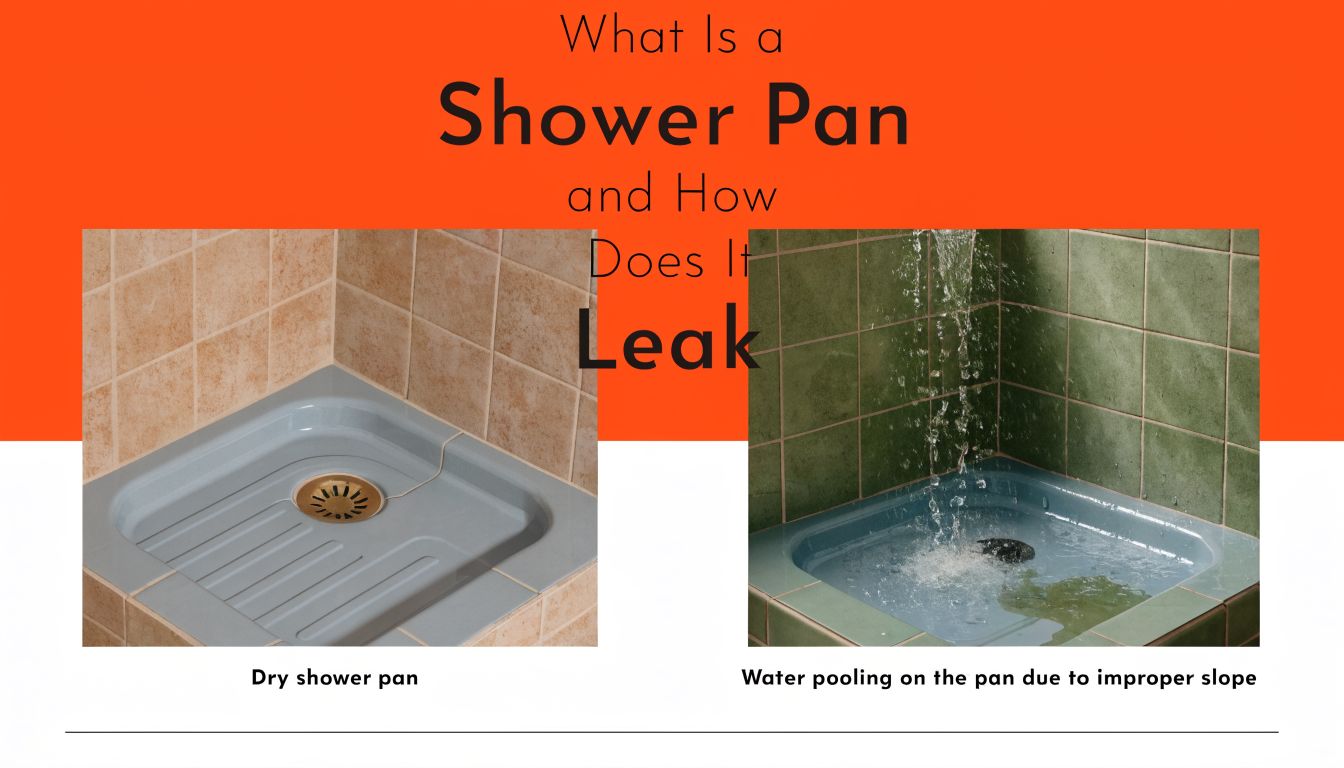
Tile and grout aren't the true waterproof layer. Many homeowners assume they are, but they're really the finished surface. Water can work through grout joints, corners, and small openings over time. The pan liner below is what protects the house.
That's why surface fixes often disappoint. Fresh caulk can improve appearance. It can even stop a minor seam issue. But if the liner underneath has failed, the leak keeps going.
Industry experts estimate that shower pan failure occurs in approximately 75% of tiled showers because of improper liner installation, including punctures from tools and poorly sealed corners that allow slow leaks to develop (common causes of shower pan failure).
In practice, shower pans usually leak for three reasons:
Installation errors
Corners are folded badly. The liner is cut and reworked. Fasteners go where they shouldn't. The drain connection isn't sealed properly from day one.
Age and material fatigue
Older systems eventually wear out. Some older homes still have aging pan materials that become brittle or crack after years of service.
Damage during remodels or repairs
A misplaced screw, nail, or tool puncture can turn a sound liner into a hidden leak path.
The leak you see in the room below is often the end of the water's path, not the beginning.
A lot of people blame the shower valve, the drain pipe, or the grout first. Those can leak too. But with a true leaky shower pan, the damage often builds below the surface long before the bathroom looks bad.
That's why this issue can be so destructive. The shower still seems usable while moisture spreads into subflooring, framing, and the cavity below the bathroom.
Most shower pan leaks don't announce themselves with standing water on the bathroom floor. They leave scattered evidence instead. The key is knowing which clues belong together.
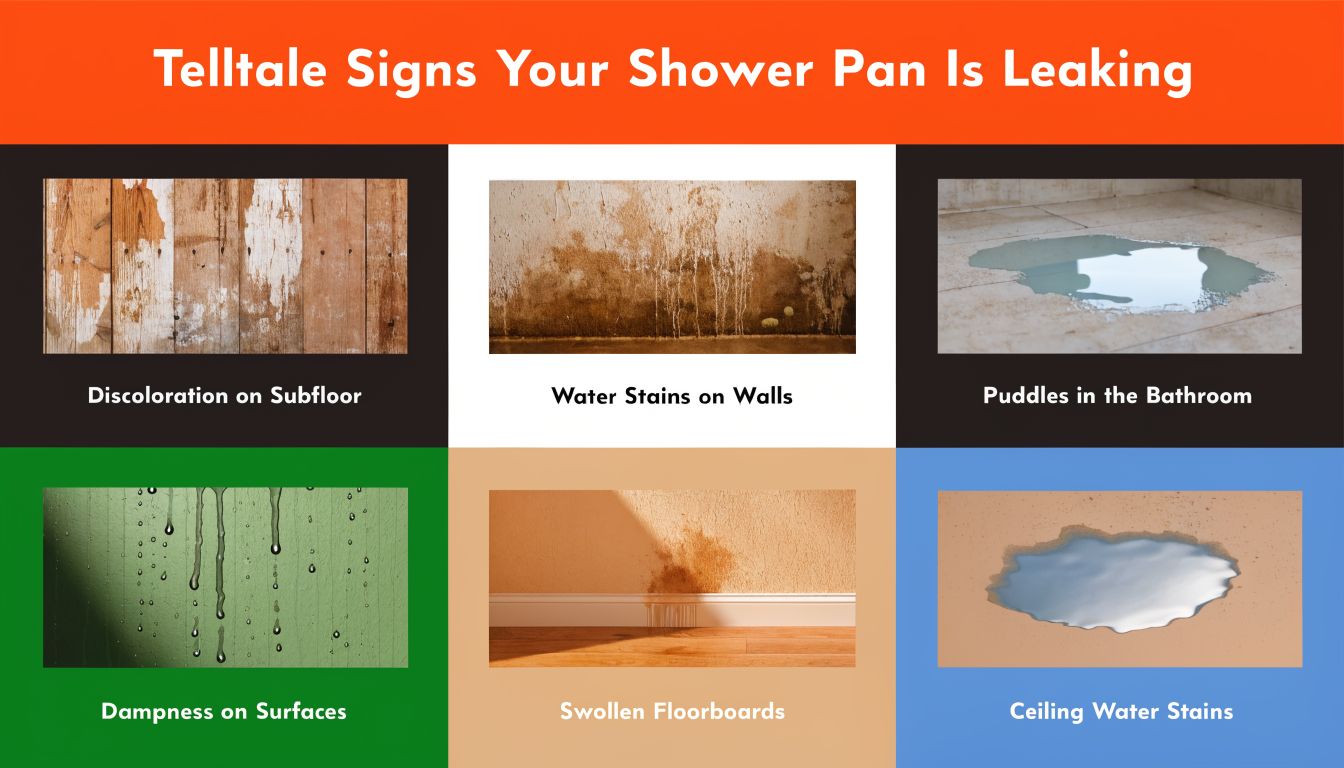
Start with the areas just outside the shower and the room below it. You don't need special equipment for this first pass.
Ceiling stains below the bathroom
Yellowing, browning, bubbling paint, or soft drywall under an upstairs shower is one of the clearest warning signs.
Loose floor tile or crumbling grout
When the base stays wet underneath, tile can shift and grout can crack or loosen.
Persistent musty smell
A shower that smells earthy even after cleaning often points to hidden moisture under the tile or behind adjacent walls.
Warped trim or peeling paint nearby
Escaping water doesn't always stay inside the shower footprint.
Damp or soft flooring outside the shower
If nearby flooring feels spongy, don't ignore it.
Expert analysis found that the waterproofing membrane and drain assembly connection is the main failure point in 40 to 50% of documented shower leaks, which helps explain why damage often appears away from the shower itself as water travels along the subfloor before it becomes visible (how drain-area failures spread damage).
That matters because many homeowners chase the wrong spot. They repair stained drywall in the ceiling below, when the actual leak path began at the shower floor.
If the damage seems oddly far from the shower, that doesn't rule the shower out. It often points back to it.
Before opening walls or replacing tile, get a better picture of where moisture has traveled. Non-destructive testing can save a lot of unnecessary demolition. A good starting point is understanding non-invasive leak detection, especially if the shower still looks mostly intact.
And if you're already weighing repair against renovation, it helps to compare bathroom remodel costs vs value so you can decide whether a targeted shower repair or a broader bathroom update makes more financial sense.
Once you suspect a leaky shower pan, stop guessing and test it. The goal is to separate a pan failure from a faucet leak, a wall penetration issue, or a drain problem.
The most reliable first test is the same one tile and plumbing professionals use.

Before filling the shower, inspect the obvious surface points:
A visual check won't confirm a failed pan, but it can help you understand what may be happening and whether the shower has multiple issues.
The professional standard for diagnosis is a hydrostatic flood test. It involves sealing the drain, filling the pan with 2 inches of water, marking the level, and monitoring it for 24 to 72 hours. If the water level drops, that confirms the pan itself is leaking (professional flood test method).
Use this sequence:
Seal the drain completely
A rubber test plug is best. Waterproof tape can work if it truly blocks the opening.
Fill the shower floor with water
Stop at about 2 inches. Keep the water below the curb and don't overfill.
Mark the water line
Painter's tape or a marker on the tile works.
Leave it alone
Give the test enough time. A rushed check can miss a slow leak.
Compare the level later
If the level drops, the pan is not holding water.
A flood test answers one big question. It tells you whether the shower pan is watertight.
It does not tell you the exact point of failure. It won't show whether the breach is at a corner fold, at the drain connection, or where the wall waterproofing meets the floor. It also won't map how far the water has moved into nearby materials.
If water damage is already showing elsewhere in the house, it helps to understand broader leak tracing methods, including how to find water leak in house, because shower leaks often affect more than one area before they're discovered.
Once the pan leak is confirmed, the next question is practical. Do you patch it, repair part of it, or replace it?
The answer depends on where the failure is, how much water damage already exists, and whether the shower assembly can be trusted after repair. In these circumstances, homeowners often lose money by choosing the cheapest-looking option instead of the most durable one.
Surface touch-ups have their place. Re-caulking a seam or refreshing grout can help when the pan passes testing and the problem is limited to finish materials. But if the waterproof layer underneath has failed, surface products won't solve the underlying issue.
Topical repair products can sometimes buy time. They can also hide active moisture below the tile, which is risky in a humid Florida home. A proper repair has to match the failure.
A repair is only as good as the layer that actually stops water. In a shower, that layer is rarely the tile itself.
| Repair Type | Estimated Cost Range | Description |
|---|---|---|
| Minor fix | $30 to $500 | Small, limited repairs where the issue is caught early and the work doesn't require major tear-out. |
| Repairable leak work | $50 to $400 | A narrower repair range sometimes used when diagnostics show a minor issue may be fixable without full replacement. |
| Full shower pan replacement | $900 to $2,300 | Removal and replacement of the failed pan assembly in a standard scope of work. |
| Full replacement with subfloor work | $530 to $4,600 | Replacement cost can rise sharply when water has damaged the subfloor or surrounding structure and additional rebuild work is needed. |
Here's the practical way to understand it:
Florida homes raise the stakes because trapped moisture doesn't stay harmless. If the liner has failed, the cheapest path today can become the most expensive one once the floor is opened.
Some shower issues are reasonable for a skilled homeowner. A failed pan usually isn't one of them.
That distinction matters. People often mix up cosmetic maintenance with waterproofing repair. Replacing old caulk is basic upkeep. Rebuilding the waterproof system under a tiled shower floor is precision work.
Handle it yourself if all of the following are true:
The flood test passes
That suggests the pan is intact.
The problem is clearly surface-level
Examples include deteriorated caulk at a seam or isolated grout touch-up.
There's no sign of hidden moisture spread
No stains below, no musty smell outside the shower, no soft adjacent flooring.
If any of those points fall apart, stop treating it like a simple bathroom maintenance job.
DIY guides often promote the water test, but they rarely explain its limit. It can confirm a pan leak, but it can't isolate whether the source is a wall-to-floor transition, drain assembly problem, or another concealed failure. Professionals use tools such as thermal imaging and moisture meters to map hidden intrusion and determine whether a smaller repair in the $50 to $400 range is still realistic or whether replacement in the $530 to $4,600 range is the smarter route (advanced diagnostics for shower leaks).
That difference is important because homeowners often waste time on repeated sealant fixes while water keeps moving under the tile.
If the shower pan fails the test, the job has moved beyond DIY maintenance.
Use this rule set:
And while this issue centers on a shower, every homeowner should also know how to locate the main water shut-off valve. If water damage suddenly worsens or another plumbing issue is involved, that knowledge can reduce the immediate impact.
The best leaky shower pan repair is the one you never need. Prevention is mostly about routine observation and quick response.
A shower gives warning signs before major failure more often than people think. The problem is that small cracks, missing caulk, and minor tile movement are easy to ignore when the shower still works normally.
Inspect the shower twice a year
Look closely at grout, corners, floor-to-wall joints, and the area around the drain.
Repair failing caulk promptly
Don't leave open seams exposed to daily water.
Avoid harsh abrasion
Aggressive scrubbing tools can wear down grout and surface finishes.
Reduce standing moisture
A squeegee after showering helps keep water from sitting on surfaces longer than necessary.
Pay attention to smells
A musty bathroom is often an early warning, not a cleaning issue.
Florida's climate rewards fast maintenance and punishes delay. If moisture gets below the tile assembly, humidity gives it help. That makes early inspection and small corrections far cheaper and less disruptive than waiting for visible damage.
Homeowners who want to stay ahead of leaks and other household plumbing problems can build better habits with these practical plumbing tips for homeowners. The same mindset applies here. Small signs deserve quick action.
A leaky shower pan doesn't fix itself. But if you catch it early, confirm the source, and choose the right repair path, you can protect the bathroom, the framing below it, and your budget.
If you're dealing with a suspected shower leak in Tampa Bay or Southwest Florida, Heatwave Air Conditioning, Plumbing, & Electric can help you get a clear diagnosis and a practical repair plan before hidden moisture turns into major damage.