
Imagine waking up to a flooded kitchen or discovering a slow leak that has warped your cabinetry and caused hidden mold. These plumbing nightmares aren't just inconvenient; they're incredibly expensive, often costing thousands in repairs and water damage restoration. The frustrating part is that many of these disasters are entirely preventable with routine, proactive checks. This isn't just another generic to-do list you’ll forget about. This is a comprehensive, room-by-room, system-by-system plumbing inspection checklist designed to empower you, the homeowner, to take control.
We'll guide you through 10 critical inspection points, from water pressure testing and drain flow to the hidden condition of your sewer lines and water heater. For each item, we explain precisely what to look for, the simple tools you'll need, and provide clear guidance on when a DIY fix is smart versus when it’s crucial to call a professional. This guide goes beyond the basics, covering issues specific to Florida homes like slab leaks, the effects of hard water, and essential hurricane preparedness for your plumbing system. Integrating these steps into a regular routine is the most effective way to protect your property. For a broader perspective on home care, consider how these checks fit into a complete seasonal home maintenance checklist to ensure year-round protection.
By following this detailed checklist, you can catch small issues before they escalate into catastrophic failures. This proactive approach saves you money, stress, and the immense headache of an emergency. Let's get started on securing your home's most vital, and often most overlooked, system.
1. Water Pressure Testing
First on any comprehensive plumbing inspection checklist is testing your home's water pressure. This fundamental check measures the force of water moving through your pipes, measured in pounds per square inch (PSI). The ideal range for most residential properties is between 40 and 80 PSI. Pressure that's too low is a nuisance, while pressure that's too high can be a destructive, silent threat to your entire plumbing system.
Excessive water pressure (above 80 PSI) stresses your pipes, joints, and appliance supply lines, significantly increasing the risk of leaks, bursts, and premature failure of water heaters, washing machines, and dishwashers. On the other hand, pressure below 40 PSI results in weak showers and slow-filling appliances. Understanding the common causes of low water pressure can help you pinpoint whether the issue is with your home’s plumbing or the municipal supply.
How to Check Your Water Pressure
A simple, inexpensive water pressure gauge (available at most hardware stores) is all you need.
- Action Steps: Attach the gauge to an outdoor hose bib or your washing machine's cold water connection. Ensure all other faucets and water-using appliances are turned off, then fully open the valve. The reading on the gauge is your home's static water pressure.
- Pro Tip: For a more complete picture, test at different times of the day to see how peak neighborhood usage affects your pressure. Documenting this baseline is crucial for future comparisons.
- Florida Consideration: In areas with high municipal water pressure, a Pressure Regulating Valve (PRV) is essential. These devices are often overlooked but are critical for protecting your system. If your test reveals pressure above 80 PSI, installing or replacing a PRV should be a top priority.
2. Leak Detection and Water Stains
A crucial visual component of any plumbing inspection checklist is the hunt for leaks and water stains. This step involves carefully scanning your home for any signs of moisture intrusion, which can range from obvious drips to subtle discoloration. These visual cues are often the first and only warning signs of a hidden problem, such as a failing pipe, a compromised seal around a fixture, or a slow drainage issue that is causing water to back up and escape.
Finding a water stain doesn't always mean there's an active disaster; it could be a remnant of a past, repaired issue. However, any new, damp, or growing stain is a red flag that requires immediate attention. Ignoring these signs can lead to significant structural damage, wood rot, and dangerous mold growth that compromises your home's integrity and your family's health. You can learn more about professional residential leak detection to understand how experts pinpoint these hidden issues.

How to Inspect for Leaks and Stains
This inspection requires a keen eye and a bright flashlight to illuminate dark corners and hidden areas.
- Action Steps: Systematically check under every sink, behind toilets, and around the base of tubs and showers. Scan ceilings and walls, paying close attention to areas directly below upstairs bathrooms or laundry rooms. Look for telltale signs like peeling paint, warped baseboards, soft spots in drywall, or discolored rings on the ceiling.
- Pro Tip: Use a moisture meter on any suspicious spots to get a definitive reading. A high moisture level confirms an active leak, even if the surface feels dry to the touch. Document any findings with photos for your records.
- Florida Consideration: High humidity in Florida can sometimes be mistaken for a leak, but it also creates the perfect environment for mold to thrive once a leak starts. Pay extra attention to areas around HVAC air handlers, which can have clogged condensate drain lines that overflow and cause significant water damage inside walls and ceilings.
3. Drain Line Functionality and Flow Rate
After checking water pressure, the next crucial step on any plumbing inspection checklist is evaluating drain performance. This test assesses how efficiently wastewater exits your home through sinks, tubs, showers, and toilets. A properly functioning drainage system carries water away swiftly and silently, but slow drains, gurgling sounds, or backups are clear indicators of underlying problems like clogs, improper venting, or incorrect pipe slope.
Ignoring a slow drain can lead to complete blockages, water damage, and unsanitary backups. A kitchen sink that drains slowly, for instance, often points to grease and food particle buildup in the P-trap or drain line. If multiple drains on the same floor are slow, it could signal a more serious blockage further down the main sewer line. Timely intervention can prevent a minor inconvenience from becoming a major, costly repair. If you notice persistent issues, professional drain cleaning services can resolve deep-seated clogs that DIY methods can't reach.
How to Check Your Drains
Testing your drains is straightforward and requires no special tools, just careful observation.
- Action Steps: One by one, turn each faucet (sinks, tubs, showers) to full blast and let it run for at least 60 seconds. Watch how quickly the water drains. After it empties, check for any standing water. Flush each toilet and observe if it refills properly and doesn't back up into nearby fixtures.
- Pro Tip: For a stress test, fill all bathtubs and sinks simultaneously, then pull the plugs and flush all toilets at once. This simulates heavy usage and can reveal system-wide weaknesses or partial blockages in the main drain line that wouldn't otherwise be obvious. Listen for unusual gurgling sounds or sewage odors, as these often indicate venting problems or a breach in the drain line.
- Florida Consideration: Due to the sandy soil and high water table, drain lines in Florida are susceptible to shifting, root intrusion, and "bellies" (low spots in the pipe). These issues can cause chronic blockages. If you notice persistent slow drains, especially in ground-floor fixtures, it's wise to schedule a professional camera inspection to assess the condition of your underground sewer lines.
4. Water Heater Inspection
A cornerstone of any plumbing inspection checklist is a thorough evaluation of your water heater. This appliance works tirelessly behind the scenes, and its health is vital for both comfort and safety. The inspection covers its age, installation quality, operational efficiency, and critical safety components like the temperature and pressure relief (TPR) valve. A failing water heater can lead to anything from a cold shower to a catastrophic flood or, in rare cases, a dangerous pressure explosion.
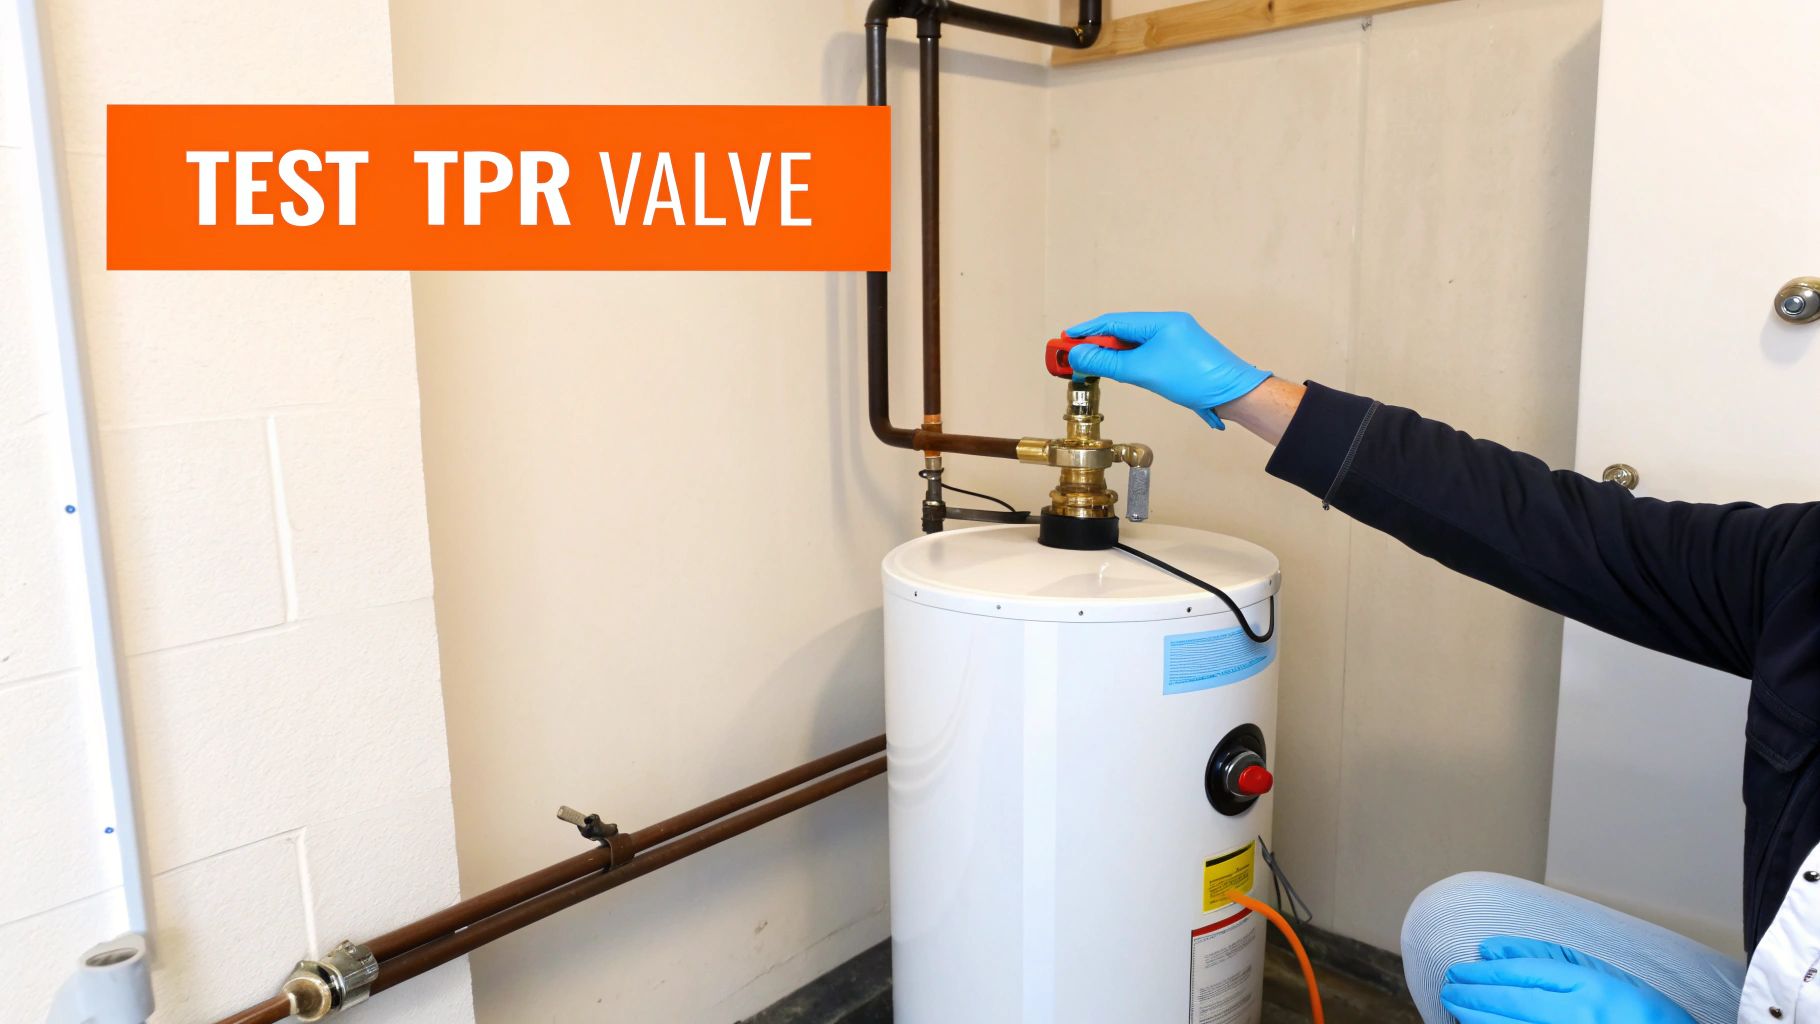
Neglecting this unit is a common oversight. Signs of trouble like corrosion on the tank, improper venting on gas models, or a malfunctioning TPR valve can create serious hazards, including water damage and carbon monoxide accumulation. A comprehensive inspection ensures the unit is not only providing hot water efficiently but also operating safely within your home. For a deeper dive into maintenance and replacement signs, you can find more information about water heaters on heatwavehvac.com.
How to Inspect Your Water Heater
A visual check combined with a few simple functional tests can reveal the condition of your unit.
- Action Steps: Start by locating the manufacturer's label to determine the unit's age; most last 8-12 years. Look for any signs of rust or corrosion on the tank and fittings. Check that the TPR valve's discharge pipe is aimed downward and terminates near the floor. Finally, carefully lift the TPR valve's test lever slightly to ensure it releases a burst of water and seals back properly.
- Pro Tip: Annually flushing the tank is the single best thing you can do to extend its life. This process removes sediment buildup that corrodes the tank from the inside and reduces heating efficiency.
- Florida Consideration: High humidity and salt in the air, especially in coastal areas like Tampa and Fort Myers, can accelerate exterior corrosion on water heaters, particularly those located in garages. Additionally, Florida's hard water can lead to faster sediment buildup, making annual flushing even more critical to prevent premature failure.
5. Pipe Material Assessment and Condition
A crucial part of any plumbing inspection checklist is identifying and evaluating the materials used for your pipes. The type of pipe, its age, and its current condition are fundamental indicators of your system's overall health and longevity. Materials like copper, PVC, and PEX have different lifespans and vulnerabilities, while older materials like galvanized steel or the notorious polybutylene can pose significant risks.
Understanding your home’s pipe materials helps you anticipate future problems. For instance, galvanized steel pipes, common in homes built before the 1960s, corrode from the inside out, leading to restricted water flow and eventual leaks. Similarly, polybutylene (PB) piping, used from the late 1970s to the mid-1990s, is known for becoming brittle and failing suddenly without warning. A thorough assessment reveals these hidden liabilities before they cause catastrophic damage.
How to Assess Your Pipe Materials
This inspection involves a visual survey of all accessible plumbing lines, typically found in basements, crawl spaces, attics, and under sinks.
- Action Steps: Visually inspect pipes for their color and markings. Copper is reddish-brown, PVC is typically white, and galvanized steel is a dull gray. Look for stamps or text on the pipes, which can identify the material (e.g., "PB2110" for polybutylene). Note any signs of corrosion (green stains on copper, rust on steel), bulging, discoloration, or sagging between supports.
- Pro Tip: Take clear photos of different pipe sections, especially areas with visible corrosion, discoloration, or at connection points between different materials. This documentation is invaluable when consulting with a professional plumber or for insurance purposes.
- Florida Consideration: In Florida's humid climate, corrosion is a major concern. Check where pipes, especially copper, come into contact with concrete slab foundations, as the chemical reaction can cause accelerated deterioration and lead to slab leaks. Also, ensure any PEX tubing used in attics or near windows is not exposed to direct sunlight, which causes it to degrade and become brittle.
6. Fixture Supply Lines and Connections
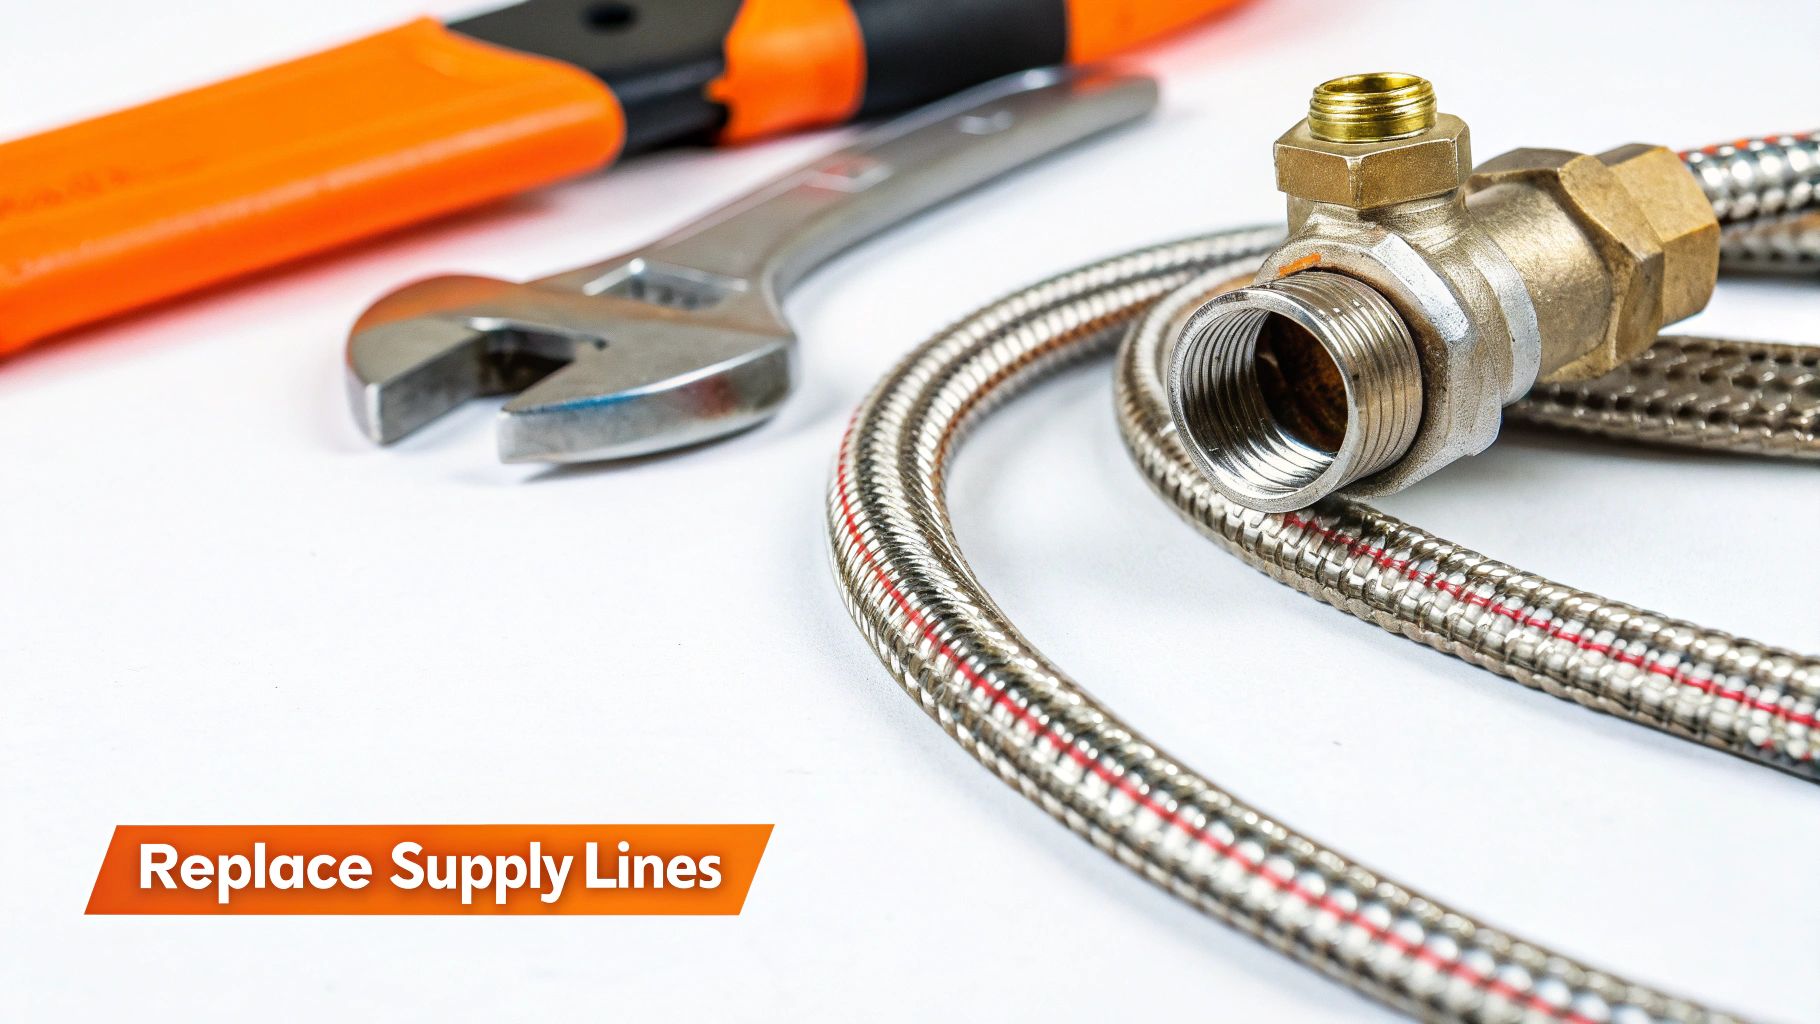
Often overlooked, the small supply lines connecting your fixtures to the main water pipes are critical points of failure. This part of a plumbing inspection checklist involves a close look at the flexible hoses and shutoff valves (angle stops) under every sink, behind every toilet, and connected to your washing machine. These components are under constant pressure and can degrade over time, posing a significant risk for leaks and catastrophic water damage.
A corroded shutoff valve that won't turn or a bulging rubber supply hose are emergencies waiting to happen. Slow, undetected leaks from these connections can also lead to mold growth inside cabinetry and damage to your subflooring, making this a crucial check.
How to Inspect Fixture Connections
Carefully examine each supply line and its corresponding valve for any signs of wear, damage, or improper installation.
- Action Steps: Use a flashlight to inspect under sinks and behind toilets. Look for discoloration, rust, or mineral buildup (a white or greenish crust) on the valves and connection points. Gently run a dry paper towel along the length of each supply line to detect any moisture from pinhole leaks. Check that lines are not kinked, stretched, or rubbing against sharp surfaces.
- Pro Tip: Once a year, test each shutoff valve. Gently turn it clockwise to ensure it closes completely and then reopen it. If a valve is stiff, difficult to turn, or leaks when operated, it should be replaced immediately by a professional. A functional valve is essential for quickly stopping water flow during a leak.
- Florida Consideration: High humidity in Florida can accelerate the corrosion of metal fittings, especially the cheap, chrome-plated "pot metal" valves often used in older construction. We highly recommend upgrading any suspect valves to more durable quarter-turn ball valves and replacing old rubber or plastic supply lines with braided stainless steel versions for superior longevity and burst resistance.
7. Toilet Inspection and Functionality
A thorough toilet inspection is a non-negotiable part of any plumbing inspection checklist. Often the source of silent, costly leaks, a malfunctioning toilet can waste thousands of gallons of water per year and cause significant hidden water damage. This check involves a comprehensive assessment of the tank and bowl integrity, the fill and flush valve operations, and the critical seal at the toilet's base.
A faulty flapper, a cracked bowl, or a failed wax ring can lead to issues ranging from a constantly running toilet to catastrophic floor damage. According to the EPA, a running toilet can waste over 200 gallons of water daily, drastically increasing your utility bills. Catching these problems early protects your home's structure and your wallet.
How to Check Your Toilets
Inspecting a toilet requires a visual and auditory check, along with a simple dye test to detect silent leaks.
- Action Steps: First, check that the toilet is stable and doesn't rock; an unstable toilet could indicate a failing wax ring. Listen for any hissing or trickling sounds from the tank, which signals a faulty fill valve. To test the flapper, add a few drops of dark food coloring to the tank water. Wait 15 minutes without flushing. If any color appears in the bowl, the flapper is leaking and needs to be replaced.
- Pro Tip: While inspecting the tank's interior, gently press down on the flapper. If you get a black, rubbery residue on your finger, the flapper is deteriorating and should be replaced, even if it hasn't started leaking yet. Also, test the water shut-off valve behind the toilet to ensure it operates smoothly and isn't seized.
- Florida Consideration: In Florida's humid environment, condensation on the toilet tank ("sweating") is common and can be mistaken for a leak. This constant moisture can damage flooring over time. If this is a persistent issue, consider an anti-sweat tank liner or upgrading to a modern toilet with an insulated tank to mitigate moisture damage.
8. Sewer Line and Main Drain Assessment
Often out of sight and out of mind, your main sewer line is arguably the single most critical pipe in your home's plumbing system. This assessment involves inspecting the primary drain line that carries all wastewater from your house to the municipal sewer or septic tank. A problem here isn't just a clog; it can be a catastrophic, unsanitary, and expensive failure affecting every drain in the house.
Issues like tree root intrusion into older clay pipes, collapsed sections of corroded cast iron, or separated joints from ground settling can lead to severe backups and property damage. A professional video camera inspection is the only definitive way to confirm the line's integrity, making it a vital part of any thorough plumbing inspection checklist, especially for homes over 30 years old. Understanding the signs of a sewer line blockage can help you act before a minor issue becomes a major disaster.
How to Assess Your Main Sewer Line
While a full video inspection requires a professional, homeowners can perform crucial preliminary checks and preventative maintenance.
- Action Steps: Locate and document your main sewer cleanout access point(s) in the yard or basement. Ensure the cap is accessible and not buried or damaged. Monitor for slow drains throughout the house, gurgling toilets, or unpleasant odors, as these are early warning signs of a main line problem.
- Pro Tip: If your home is older or has mature trees nearby, proactively schedule a video sewer inspection every 2-3 years. The cost of an inspection is a fraction of the cost of excavating your yard to repair a collapsed line. Keep a log of any drain cleaning services performed.
- Florida Consideration: Florida's shifting sandy soil, high water table, and invasive tree root systems can be particularly harsh on sewer lines. Homes built on slab foundations are also more susceptible to damage from soil settlement, causing pipe "bellies" or offsets. Installing a backflow prevention valve is a wise investment in flood-prone areas to prevent sewer backups during heavy rains or storm surges.
9. Vent Stack and Drainage Venting System
An often-overlooked but vital component of your plumbing inspection checklist is the vent stack and the entire drainage venting system. This network of pipes doesn't carry water but instead introduces air into your drain lines, allowing wastewater to flow freely and preventing a vacuum effect. It also provides a safe pathway for unpleasant sewer gases to exit your home through the roof.
Without proper venting, you’ll experience slow drains, gurgling toilets, and siphoning, where the vacuum pulls water out of your P-traps, breaking the water seal that blocks sewer gas. A malfunctioning vent system can lead to persistent, foul odors inside your home, a clear sign that something is amiss. Issues can range from a simple clog caused by debris to an improperly installed pipe terminating in the attic instead of outside.
How to Check Your Venting System
Inspecting the vent system involves both visual checks from inside your home and a careful look at the roof penetration points.
- Action Steps: Begin by tracing the main vent stack, usually visible in your attic or basement, to confirm it runs vertically and exits through the roof. On the roof, visually inspect the vent pipe opening to ensure it's clear of leaves, bird nests, or other debris. Check the flashing and sealant around the base of the vent pipe for any signs of cracking, deterioration, or gaps that could cause roof leaks.
- Pro Tip: Listen for gurgling sounds from drains when you flush a toilet or run water. This is a classic auditory clue that the system is struggling to draw in air, indicating a potential blockage or improper venting.
- Florida Consideration: During periods of heavy rain and high winds, debris can easily clog vent openings on the roof. The intense sun and humid climate can also accelerate the deterioration of the rubber boot or flashing around the vent pipe, making regular checks crucial for preventing both plumbing issues and water intrusion into your attic.
10. Backflow Prevention and Water Quality Protection
A crucial, yet often overlooked, part of any plumbing inspection checklist is the assessment of your home’s backflow prevention systems. Backflow is the undesirable reversal of water flow from a contaminated source back into your clean, potable water supply. This can happen due to changes in water pressure, creating a serious health hazard. Properly installed and functioning backflow prevention devices are the only line of defense against this dangerous contamination.
These devices, such as vacuum breakers and check valves, create a physical barrier that stops dirty water from siphoning back into your pipes. Common scenarios that can cause backflow include a garden hose left in a puddle of water, an irrigation system head submerged in fertilizer-rich runoff, or a boiler system without proper protection allowing rusty water to enter the main line. Protecting against these risks is essential for safeguarding your family’s health and maintaining the integrity of the public water supply. Examining these devices is a non-negotiable step in a comprehensive plumbing assessment.
How to Check for Backflow Risks
While some complex devices require professional testing, you can perform a basic visual inspection of key areas.
- Action Steps: Check every outdoor hose bib (spigot). Each one should have a small, typically brass or plastic, attachment called a hose bib vacuum breaker. Ensure they are present and not damaged. Visually inspect your irrigation system's main connection point for a backflow preventer assembly, which is often a larger, more complex valve set located above ground.
- Pro Tip: Never submerge a hose end in a bucket, pool, or any standing water unless it is connected to a spigot with a functioning vacuum breaker. This simple habit prevents the most common form of residential backflow.
- Florida Consideration: Florida's climate means irrigation systems and outdoor water use are constant, increasing backflow risks. Municipal codes strictly require testable backflow prevention assemblies on all irrigation and fire sprinkler systems. These devices must be tested annually by a certified technician to ensure they are functioning correctly. Proper backflow protection is also a key component of a complete home water treatment strategy.
10-Point Plumbing Inspection Comparison
| Item | Implementation Complexity | Resource Requirements | Expected Outcomes | Ideal Use Cases | Key Advantages |
|---|---|---|---|---|---|
| Water Pressure Testing | Low–Moderate, simple measurements and troubleshooting | Pressure gauge, access to multiple fixtures, time | Identify high/low pressure, regulator faults, leaks | Pre-inspection, appliance performance checks, diagnosing pressure issues | Quick, non-invasive, prevents fixture/appliance damage |
| Leak Detection and Water Stains | Low, visual-focused with targeted testing | Visual inspection, moisture meter, camera/flashlight | Detect active or historical leaks, moisture, mold risk | Pre-purchase inspections, moisture complaints, post-storm checks | Early damage detection, cost-effective, non-invasive |
| Drain Line Functionality and Flow Rate | Low–Moderate, observational testing and simple tools | Water supply, timing/observation, basic auger/snakes if needed | Reveal slow drains, partial blockages, venting problems | Routine maintenance, slow-drain complaints, multi-fixture testing | Prevents backups, simple diagnostic method |
| Water Heater Inspection | Moderate–High, safety and operational checks | TPR test tools, inspection access, possible contractor | Identify safety hazards, sediment, inefficiency, replacement need | Aging units, safety inspections, home sales | Prevents dangerous failures, ensures code compliance |
| Pipe Material Assessment and Condition | Moderate–High, requires material knowledge and access | Visual inspection, tooling, occasional destructive or specialist tests | Identify corrosive/failed materials, improper joints/support | Older homes, renovation planning, long-term risk assessment | Reveals latent failure risks, informs replacement strategy |
| Fixture Supply Lines and Connections | Low, focused visual and functional checks | Visual tools, basic hand tools, replacement parts as needed | Find leaks, failing connectors, inaccessible shutoffs | Fixture failures, pre-inspection, quick maintenance rounds | Fast identification of imminent failures, easy fixes |
| Toilet Inspection and Functionality | Low, simple tests and observations | Dye test supplies, basic tools, access to shutoffs | Detect running toilets, leaks, flapper/fill valve failures | Water waste reduction, routine home maintenance | Inexpensive repairs, large water-savings potential |
| Sewer Line and Main Drain Assessment | High, specialized diagnostics and potential remediation | CCTV camera services, cleanout access, professional crews | Detect root intrusion, collapses, joint failures, backups | Recurring backups, old properties, major renovations | Prevents costly excavations, provides definitive evidence |
| Vent Stack and Drainage Venting System | Moderate, requires roof/attic access and routing checks | Roof access, inspection tools, potential plumber | Find blockages, improper routing/size, trap siphoning risks | Odor/drainage problems, winter freezing issues, remodels | Prevents slow drains and sewer gas odors, improves system function |
| Backflow Prevention and Water Quality Protection | Moderate, device testing and regulatory compliance | Backflow testers, installation parts, certification services | Identify cross-connections, ensure anti-backflow function, compliance | Irrigation systems, boilers, commercial sites, code-mandated areas | Protects public water supply, often low-cost prevention, required by code |
Your Next Steps: Turning Your Inspection into Action
You have now worked through a comprehensive, room-by-room, system-by-system plumbing inspection checklist. More than just a list of tasks, this guide is a powerful tool for proactive homeownership, empowering you to understand the intricate network of pipes, fixtures, and appliances that keep your home running smoothly. An inspection, however, is only the first step; its true value lies in the decisive action you take based on your findings.
By methodically checking everything from the water pressure at your main shutoff valve to the condition of your water heater’s anode rod and the flow rate of your drains, you have created a detailed snapshot of your home’s plumbing health. This process transforms abstract worries about potential issues into a concrete, prioritized action plan. You’ve moved from simply living in your home to actively managing one of its most critical systems.
Prioritizing Your Findings: From DIY to Professional Intervention
Your completed checklist is now your roadmap. It’s essential to categorize your findings to determine the appropriate next steps. Not every issue demands an emergency call to a plumber, but ignoring critical warning signs can lead to catastrophic and costly damage.
-
Green Light (OK/DIY Monitor): Items marked as 'OK' or requiring simple monitoring are your victories. This could be a secure faucet connection, a toilet that flushes perfectly, or pipes that show no signs of corrosion. For minor tasks like replacing a worn toilet flapper, cleaning an aerator, or tightening a loose supply line nut, your DIY skills are often more than sufficient. These small, preventative actions are the cornerstone of effective home maintenance.
-
Yellow Light (Monitor/Caution): This category includes issues that aren't emergencies but require attention. Perhaps you noted a slow drain in the guest bathroom, slight discoloration around a pipe joint, or a water heater that's approaching the end of its typical lifespan. These are the problems you can’t afford to forget. Schedule a time to address them or book a professional consultation to get an expert opinion before they escalate.
-
Red Light (Urgent/Call a Professional): Any item marked 'Urgent' requires immediate professional intervention. This is not the time for a DIY attempt. In Florida, this category critically includes:
- High Water Pressure Readings: Consistently high pressure will destroy your pipes, fixtures, and appliances.
- Signs of a Slab Leak: Unexplained warm spots on the floor, the sound of running water, or foundation cracks demand an expert.
- Major Water Heater Corrosion: Significant rust on the tank or fittings indicates imminent failure.
- Main Sewer Line Blockages: If multiple drains are slow or backing up, the problem lies deep in your sewer line.
Key Insight: Attempting to fix a 'Red Light' issue without proper training and tools can exponentially worsen the problem. A failed DIY water heater installation can cause major flooding, while an improper sewer line cleanout can lead to hazardous wastewater backups inside your home.
The Heatwave Advantage for Florida Homeowners
For residents from Tampa Bay down to Fort Myers, the findings from your plumbing inspection checklist can be addressed with confidence by a trusted local expert. The unique environmental factors in our region, such as high humidity, corrosive saltwater air, and the risk of hurricanes, make professional expertise invaluable. Whether it's ensuring your water heater is properly strapped for hurricane season or diagnosing a complex slab leak, a specialist familiar with Florida’s plumbing challenges is your greatest asset. Don't let your diligent inspection efforts go to waste by delaying action. Secure your home, protect your investment, and gain peace of mind by addressing your plumbing needs today.
When your plumbing inspection checklist reveals issues that go beyond a simple DIY fix, trust the certified experts who understand Florida’s unique plumbing demands. For a professional diagnosis and reliable solution, contact Heatwave Air Conditioning, Plumbing, & Electric. Let our team help you turn your checklist findings into lasting peace of mind.