Welcome to your essential guide for keeping your home's plumbing in top condition. For homeowners in Tampa Bay and across Southwest Florida, our unique climate of high humidity, intense summer heat, and sandy soil presents specific challenges that can wreak havoc on plumbing systems. From mineral buildup accelerated by hard water to the constant threat of moisture-related issues, ignoring routine maintenance is not just risky, it's a recipe for costly emergencies.
This comprehensive plumbing maintenance checklist is more than just a list; it is a strategic plan tailored for our local environment. We will break down 10 critical tasks into a clear, actionable schedule organized by frequency: monthly, seasonally, and annually. This structured approach helps prevent minor issues from escalating into major disasters, such as hidden leaks or sudden water heater failures. For property owners aiming for long-term health, integrating these plumbing tasks into a broader comprehensive rental property maintenance checklist is essential for protecting your investment.
Inside this guide, you will learn which jobs you can confidently tackle yourself with our step-by-step instructions, what tools you will need, and, most importantly, the specific warning signs that mean it is time to call in a professional. By investing a little time now, you can protect your property, save money on utility bills by improving efficiency, and ensure your plumbing runs smoothly year-round. Let's get started on fortifying your home against common plumbing problems.
1. Drain Cleaning and De-clogging
A slow drain is more than an annoyance; it's the first warning sign of a potential blockage that can lead to foul odors, backups, and even water damage. Regular drain cleaning is a cornerstone of any effective plumbing maintenance checklist, especially in Florida where humidity can exacerbate buildup issues. This proactive task involves removing accumulated hair, soap scum, grease, and other debris from your pipes to maintain clear, consistent water flow.
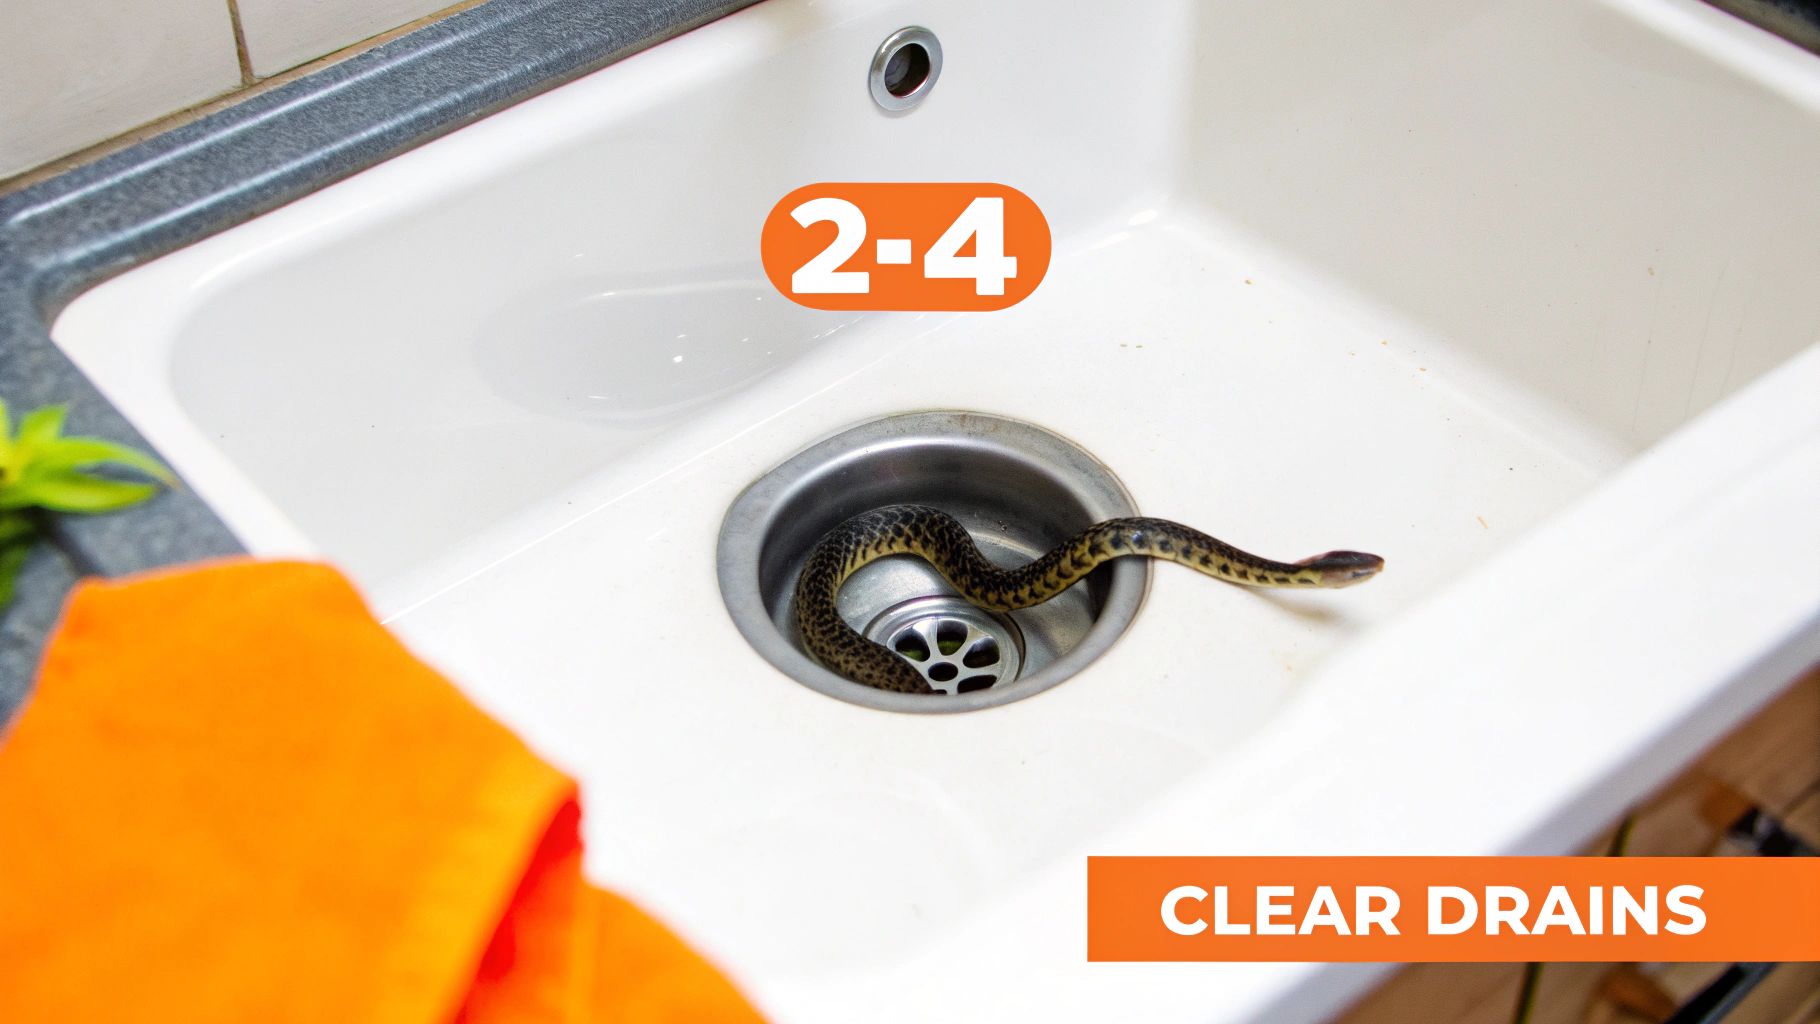
This preventative maintenance is crucial for preventing emergencies. For instance, apartment complexes that schedule quarterly professional drain cleanings often see a significant reduction in urgent plumbing calls, saving both time and money. Similarly, homeowners who use a simple drain snake monthly can prevent most common household clogs from ever forming.
DIY Drain Maintenance Tips
You can easily incorporate drain care into your routine with a few simple steps. These actions are particularly important for high-use drains in kitchens, bathrooms, and laundry rooms.
- Install Drain Screens: Place mesh screens over all drain openings to catch hair, food scraps, and other large debris before they enter your pipes.
- Monthly Flush: For kitchen sinks, pour a mixture of baking soda and vinegar down the drain once a month. Let it sit for 15 minutes, then flush with hot water to dissolve grease buildup. For more information on handling grease, see our guide on what happens when you pour oil down the drain.
- Use Enzymatic Cleaners: Instead of harsh chemical drain cleaners that can damage pipes, opt for enzymatic (bacterial) cleaners. These products use natural enzymes to break down organic waste safely.
When to Call a Professional
While DIY methods are effective for minor clogs and regular upkeep, some situations require professional intervention. If you notice multiple drains backing up simultaneously, hear gurgling sounds from your pipes, or can't clear a clog with a plunger or snake, it's time to call a plumber. These are signs of a deeper issue in your main sewer line. A professional can perform a camera inspection and use hydro-jetting, a high-pressure water system, to thoroughly and safely clear stubborn blockages without damaging your pipes.
2. Inspect and Clean Aerators
A faucet aerator is the small, often overlooked mesh screen at the tip of your faucet that mixes air with water. This simple component is key to preventing splashes and conserving water, but it can easily become clogged with mineral deposits and sediment. Regularly cleaning your aerators is a quick and effective part of any plumbing maintenance checklist, particularly in Florida, where hard water is common and can quickly lead to blockages and reduced water pressure.
This task directly impacts your water efficiency and daily convenience. For instance, hotels in high-traffic tourist areas often clean aerators weekly to ensure a consistent and pleasant guest experience. Similarly, homeowners in states with hard water, like much of Florida, who clean their aerators quarterly can prevent the frustrating trickle of low water pressure and maintain the efficiency of their fixtures.
DIY Aerator Cleaning Tips
You can restore your faucet’s performance in just a few minutes with simple household items. This is especially important for bathroom and kitchen sinks where mineral buildup is most common.
- Regular Schedule: Plan to inspect and clean your faucet aerators every 3 to 6 months. If you notice a drop in water pressure sooner, it's time for a cleaning.
- Vinegar Soak: Unscrew the aerator from the faucet tip (use pliers with a cloth to prevent scratching if needed). Soak the components in a small bowl of white vinegar for a few hours to dissolve stubborn mineral deposits.
- Gentle Scrub: After soaking, use a small brush or an old toothbrush to gently scrub away any remaining debris from the mesh screen. Rinse all parts thoroughly before reassembling.
- Proper Reassembly: Pay attention to the order and orientation of the small parts as you take them apart. Reinstalling them correctly is crucial for the aerator to function properly.
When to Call a Professional
DIY aerator cleaning handles most pressure issues caused by simple buildup. However, if you've thoroughly cleaned the aerator and the water pressure is still low, it's time to call a professional. Persistently low pressure in a single faucet could indicate a problem with the fixture's internal components or the water supply line connected to it. If multiple faucets have low pressure, it may signal a more significant issue like a partially closed main shutoff valve or a leak somewhere in your system. A licensed plumber can accurately diagnose these deeper problems.
3. Check for Leaks and Water Damage
A small drip can quickly escalate into a major problem, causing structural damage, fostering mold growth, and wasting a surprising amount of water. Systematically checking for leaks is a vital part of any plumbing maintenance checklist, especially in Florida’s humid climate where moisture issues can rapidly worsen. This proactive inspection involves looking for drips, water stains, and other signs of moisture around all visible plumbing fixtures and appliances.
Early detection is the key to prevention and significant savings. A single faucet dripping once per second can waste over 3,000 gallons of water a year. Even a silent toilet leak can go unnoticed while wasting up to 30 gallons daily. Homeowners who catch these issues early can often avoid the thousands of dollars in repairs associated with extensive water damage and mold remediation.
DIY Leak Detection Tips
You can perform a thorough leak inspection yourself with a few simple, regular checks. Pay close attention to areas that are often out of sight, like under sinks and behind appliances.
- Check Your Water Meter: To find hidden leaks, turn off all water-using appliances and faucets in your home. Then, check your water meter. If the dial is still moving, you likely have a leak somewhere in your system.
- Inspect Visible Pipes: Monthly, use a flashlight to inspect the pipes under every sink and behind toilets. Look for signs of moisture, active drips, corrosion, or discoloration on the cabinetry floor.
- Look for Water Stains: Regularly scan your ceilings, walls, and floors for any discolored patches, peeling paint, or warping. These are classic signs of a hidden leak from a pipe within the wall or ceiling.
- Monitor Your Water Bill: Keep track of your monthly water bills. A sudden, unexplained spike in usage is a strong indicator of a significant leak that needs immediate attention.
When to Call a Professional
While DIY checks can catch many common issues, some leaks are difficult to locate and require specialized equipment. If your water meter test indicates a leak but you can’t find the source, or if you see significant water stains appearing, it's time to call for professional help. Despite the best maintenance, severe leaks can still occur; in these situations, understanding the process of fighting a water damage insurance claim becomes essential for homeowners.
A professional plumber can use acoustic listening devices and thermal imaging cameras to pinpoint the exact location of a hidden leak without tearing into your walls. Learn more about how our experts can help with residential leak detection in St. Petersburg, FL.
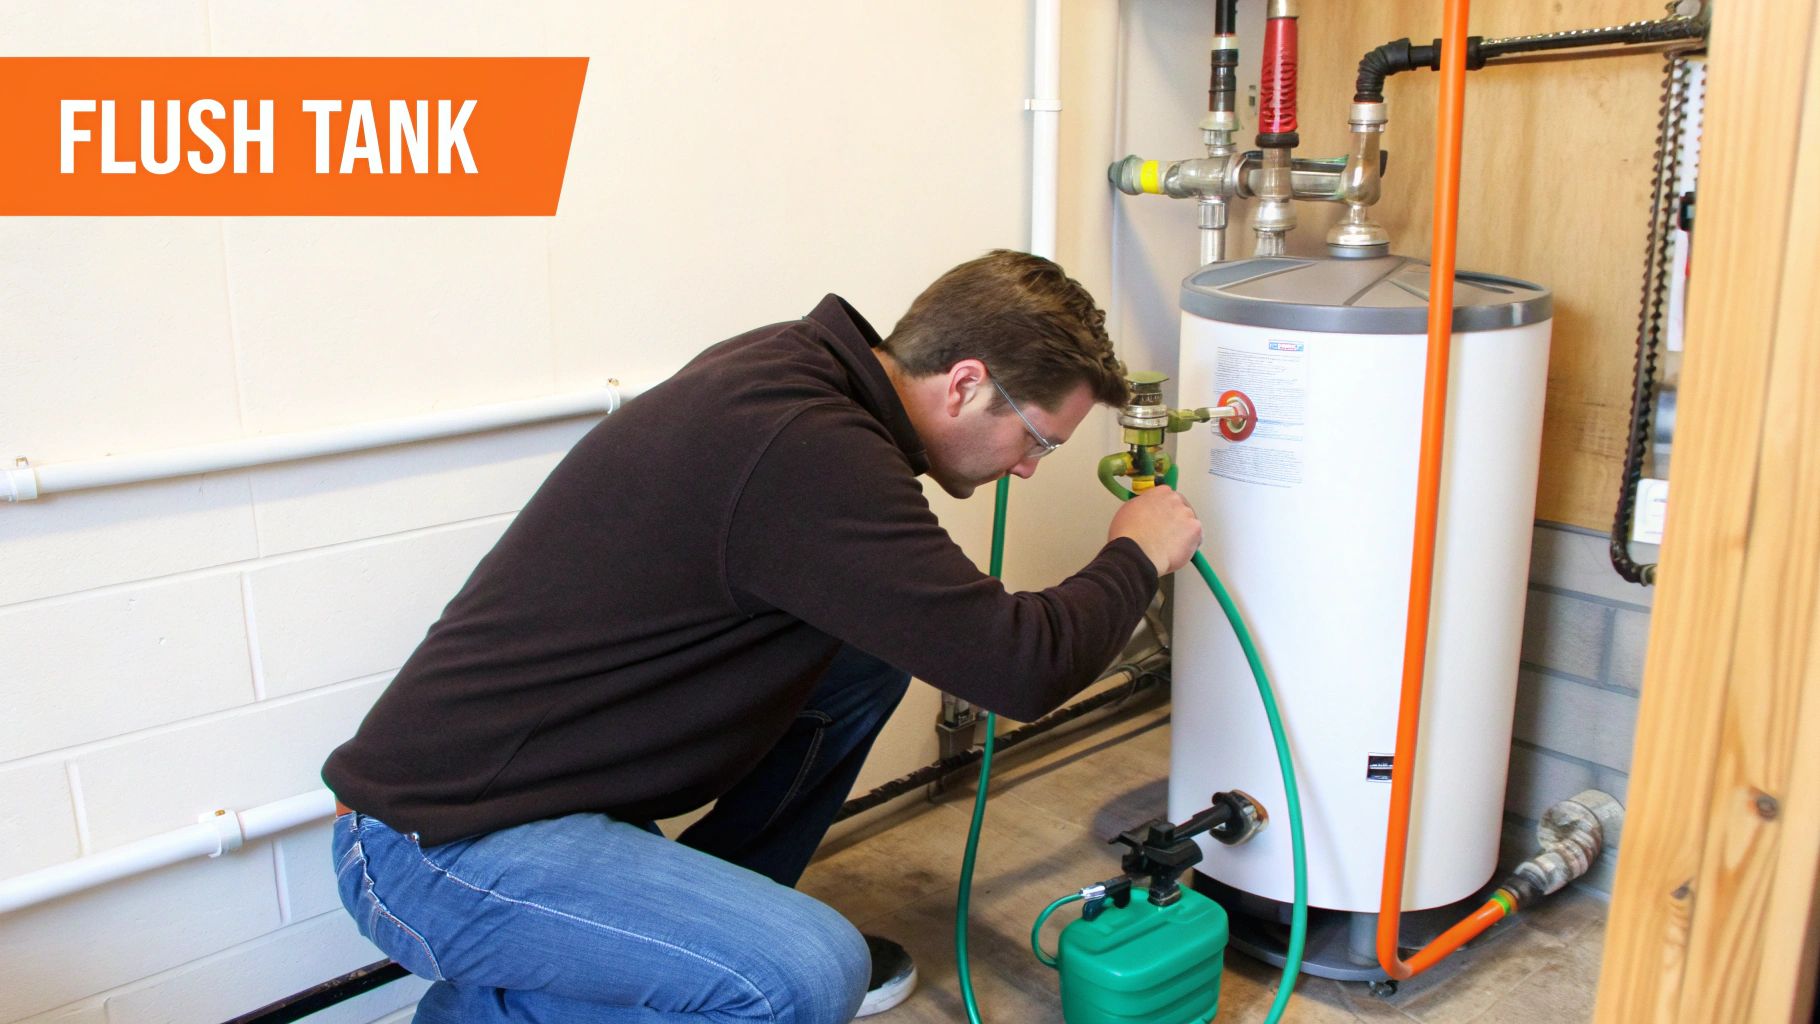
4. Flush Water Heater Tank
Over time, sediment from minerals like calcium and magnesium naturally present in Florida's hard water settles at the bottom of your water heater tank. This buildup acts as an insulator, forcing the heating element to work harder and longer to heat your water, which reduces efficiency and can eventually damage the tank. Flushing the tank is a critical part of any plumbing maintenance checklist, as it removes this sediment to restore performance and prevent premature failure.
This maintenance can extend the life of your equipment by 30-50%, often taking a standard tank from an 8-year lifespan to over 13 years. Energy audits consistently show a 5-15% gain in heating efficiency after a thorough flush, which translates directly into lower utility bills for homeowners in areas like Tampa Bay.
DIY Water Heater Flush Tips
Annual flushing is recommended, but for areas with particularly hard water, performing this task every six months is ideal. It’s a straightforward process you can handle with a few simple steps.
- Prepare the Heater: Turn off the power (or gas) to the water heater. Let the water cool for at least 30-60 minutes to prevent scalding.
- Drain the Tank: Attach a standard garden hose to the drain valve located at the bottom of the tank and run the other end outside or to a floor drain. Open the valve and a hot water tap nearby to allow air to enter and the tank to drain.
- Flush Until Clear: Once the tank is empty, briefly turn the cold water supply back on to stir up and flush out the remaining sediment. Repeat until the water running from the hose is clear. For more detailed steps, you can learn how to extend the life of your water heater.
- Test the T&P Valve: While the tank is refilling, it's a good time to test the temperature and pressure (T&P) relief valve by lifting the lever. Water should discharge from the pipe.
When to Call a Professional
If you’ve never flushed your water heater or if the unit is several years old, the drain valve may be seized or brittle. Forcing it could cause it to break, leading to a major leak. If the valve won't open, if you notice significant rust, or if you're uncomfortable performing the flush yourself, it is best to call a professional. A plumber can handle stuck components safely, inspect the anode rod for corrosion, and ensure the system is operating at peak performance.
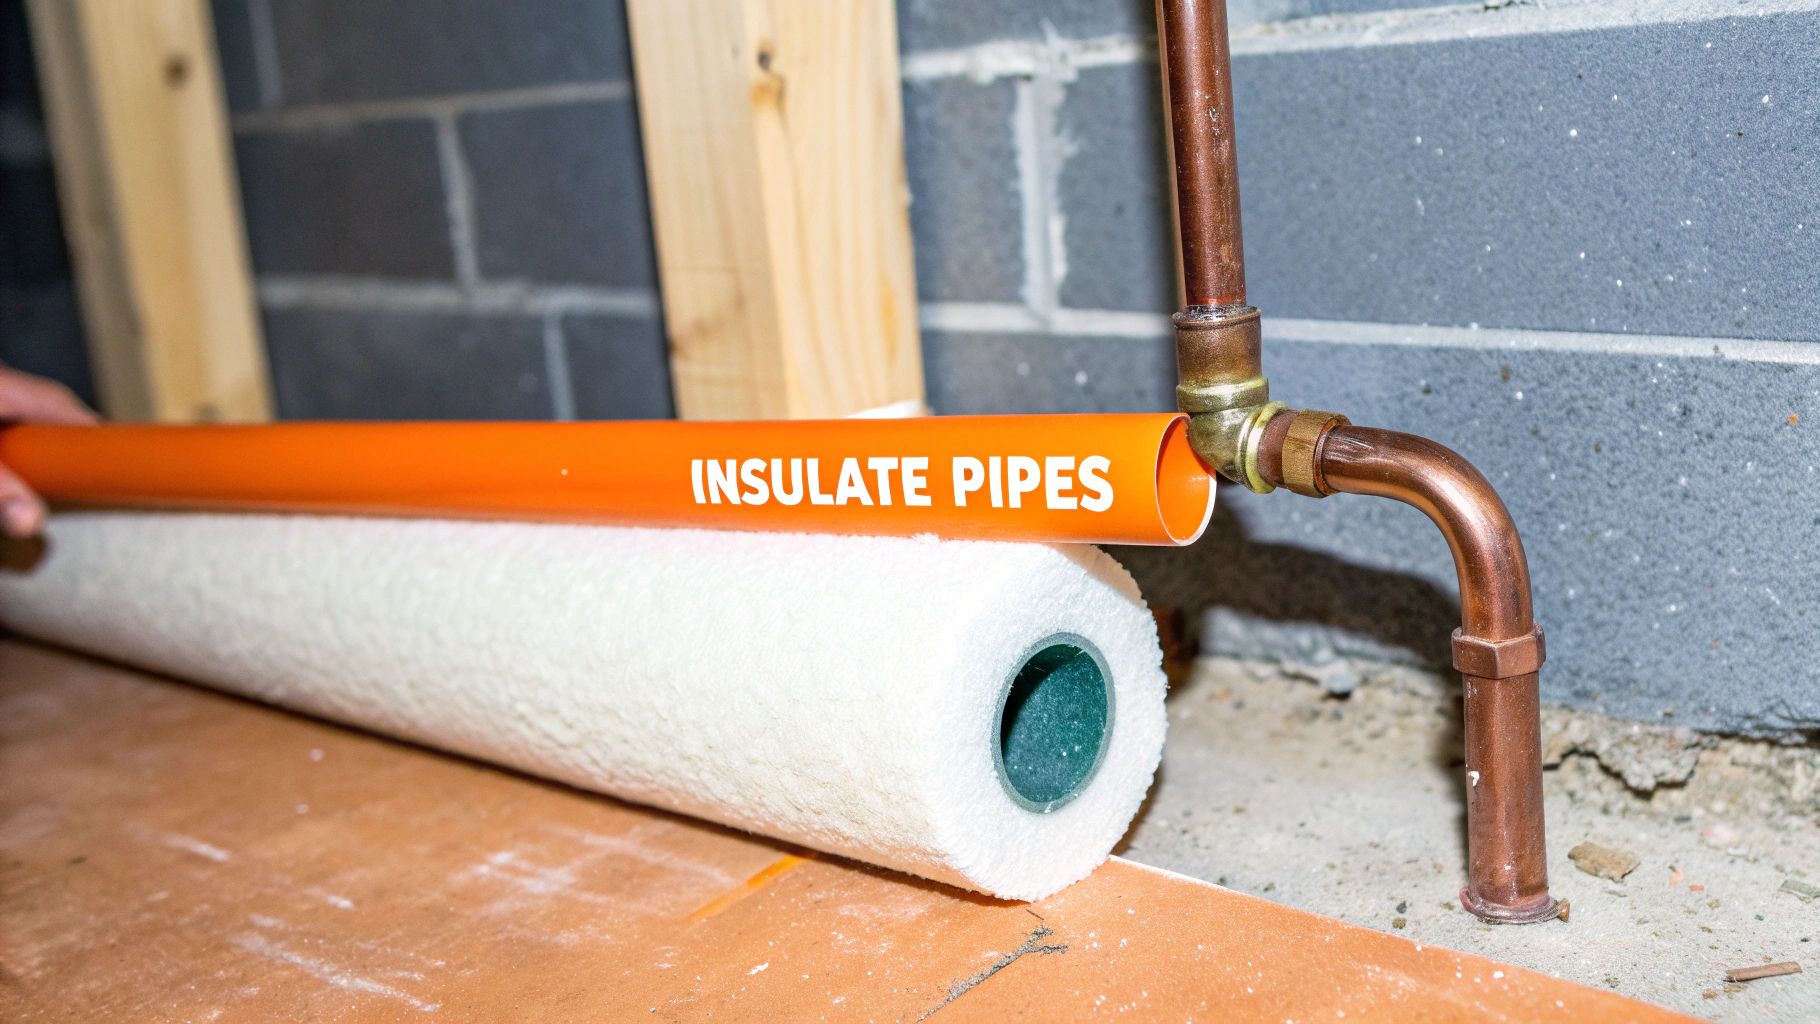
5. Insulate Exposed Pipes
While Florida's winters are mild, a sudden cold snap can still pose a risk to your plumbing system, especially for exposed pipes in unheated areas like attics, crawl spaces, or garages. Insulating these pipes is a simple, cost-effective task that prevents freezing and bursting, which can cause catastrophic water damage. Beyond cold protection, insulation also improves energy efficiency by reducing heat loss from hot water lines, meaning your water heater works less to deliver hot water to your faucet.
This proactive step is a critical part of any comprehensive plumbing maintenance checklist. For instance, mobile homes, which often have more exposed plumbing, can avoid up to 90% of freeze-related burst pipe issues with proper insulation. Even in commercial buildings, comprehensive pipe insulation has been shown to reduce water heating costs by a noticeable margin, demonstrating its value beyond just emergency prevention.
DIY Pipe Insulation Tips
Insulating pipes is a straightforward project that most homeowners can tackle in an afternoon. You can find pre-slit foam pipe sleeves and foil tape at any local hardware store.
- Prioritize Key Areas: Start with pipes in the most vulnerable, unheated locations like your attic, crawl space, and along exterior walls.
- Insulate Both Lines: While hot water lines are insulated for energy savings, it's equally important to insulate cold water lines to prevent them from freezing and sweating, which can cause moisture issues.
- Seal the Seams: After fitting the foam sleeves over the pipes, use foil tape or zip ties to securely seal the seams and joints. This creates a continuous thermal barrier and prevents gaps where cold air can penetrate.
- Inspect Annually: Make it a habit to check your pipe insulation each fall for signs of deterioration, compression, or pest damage and replace it as needed.
When to Call a Professional
While DIY foam sleeves work well for easily accessible pipes, some situations may require professional assistance. If you have pipes located inside walls, in very tight crawl spaces, or if you're unsure about the best type of insulation for your specific plumbing system, it's wise to consult a professional. They can ensure hard-to-reach pipes are properly protected and can advise on more advanced solutions like heat tape for areas prone to severe cold. Preparing your plumbing for different weather is a year-round task; for more information, you can explore our seasonal plumbing tips for spring.
6. Test and Service Sump Pump
For many Florida homes, especially those with basements, crawl spaces, or low-lying areas, a sump pump is a non-negotiable defense against water damage from heavy rains and rising water tables. Regular testing is a critical part of any plumbing maintenance checklist, ensuring this vital equipment is ready to activate when you need it most. This proactive maintenance involves verifying the pump's automatic operation and keeping its components clean and clear of debris.
The importance of this task cannot be overstated. Homes with regularly tested sump pumps are significantly less likely to experience basement flooding. For instance, after major flooding events, studies have consistently shown that homes with functioning sump pumps had a much higher rate of protection. This simple check provides immense peace of mind during Florida's intense rainy season.
DIY Sump Pump Maintenance Tips
You can perform essential sump pump checks yourself to ensure it's in working order. These steps are best performed seasonally, particularly before the rainy season begins.
- Test the Float Switch: The easiest way to test your pump is to pour a bucket of water into the sump pit. The water should raise the float, which activates the pump. The pump should turn on, drain the water, and then shut off.
- Clean the Pit and Intake: Unplug the pump and remove any dirt, gravel, or debris from the sump pit. Wipe down the pump and ensure its intake screen is clear of any obstructions.
- Verify the Discharge Line: Go outside and check that the discharge pipe is clear and directs water at least 4-6 feet away from your home's foundation to prevent water from cycling back into the pit.
- Check the Backup System: If your pump has a battery backup, test its functionality quarterly. Ensure the battery is charged and the connections are clean.
When to Call a Professional
While DIY testing is excellent for routine upkeep, certain issues demand expert attention. If the pump fails to turn on during a test, runs continuously without shutting off, or makes unusual grinding or rattling noises, it’s time to call a professional. These symptoms can indicate a failed switch, a motor problem, or an issue with the check valve. A licensed plumber can diagnose the problem accurately and perform necessary repairs or replacements to prevent a catastrophic failure during the next storm. For a comprehensive overview of our services, you can learn more about our plumbing solutions.
7. Check and Repair Caulking Around Fixtures
The caulk sealing your sinks, showers, and bathtubs is a small detail with a huge job: preventing water from seeping into your walls and subfloors. Over time, this sealant can crack, peel, or shrink, creating gaps that invite moisture. This water intrusion is a primary cause of mold, wood rot, and expensive structural damage, making caulk inspection a vital part of your plumbing maintenance checklist.
Neglecting this simple task can lead to significant problems. For example, undetected water damage from failed bathroom caulk can cost homeowners over $2,000 in repairs for tile replacement, subfloor fixes, and mold remediation. Conversely, many hotels in humid climates like Florida have a policy of checking and touching up caulk quarterly to prevent these issues and maintain a clean, professional appearance for guests.
DIY Caulking Tips
Refreshing the caulk around your fixtures is a manageable DIY project that protects your investment. This is especially important in high-moisture areas like bathrooms and laundry rooms.
- Choose the Right Product: Always use 100% silicone caulk for wet areas. It offers superior water resistance, flexibility, and mold-inhibiting properties compared to acrylic or latex-based options.
- Complete Removal is Key: Scrape away all the old, damaged caulk using a utility knife or a specialized caulk removal tool. Clean the surface thoroughly with rubbing alcohol to remove any residue, ensuring the new bead adheres properly.
- Apply a Continuous Bead: Cut the caulk tube tip at a 45-degree angle and apply steady pressure to lay a smooth, continuous bead. To get a clean, professional line, run a wet finger or a caulk finishing tool along the bead.
- Allow for Curing: Let the new caulk cure for at least 24 to 48 hours, or as directed by the manufacturer, before exposing it to water.
When to Call a Professional
While re-caulking is often a DIY task, professional help is recommended if you discover signs of existing water damage. If the wall behind the fixture feels soft, if you see discolored drywall, or if tiles are loose, a plumber should assess the situation. These symptoms indicate that water has already penetrated the surface, and a professional can determine the extent of the damage and perform the necessary repairs before applying a new, secure seal.
8. Inspect and Clean Showerheads
A weak or uneven spray from your showerhead is often the first sign of mineral buildup, a common issue in Florida due to hard water. This accumulation of calcium and magnesium, known as scale, clogs the small nozzles, restricting water flow, reducing pressure, and creating an unsatisfying shower experience. Regularly inspecting and cleaning your showerheads is a simple but vital part of any plumbing maintenance checklist to ensure efficiency and performance.
This maintenance task directly impacts your daily routine and water usage. For example, hotels often implement weekly showerhead cleanings to maintain high guest satisfaction scores related to water pressure. Similarly, homeowners in hard water regions like Southwest Florida who clean their showerheads quarterly prevent significant performance degradation and can prolong the fixture's lifespan, avoiding premature replacement costs.
DIY Showerhead Maintenance Tips
You can easily restore your showerhead's performance and efficiency with a few household items. This process dissolves mineral deposits without requiring harsh chemicals that could damage your fixture's finish.
- Soak in Vinegar: For removable showerheads, submerge them in a bowl of white vinegar overnight. For fixed heads, fill a plastic bag with vinegar and secure it over the showerhead with a rubber band, ensuring the nozzles are fully immersed.
- Clear Stubborn Clogs: After soaking, use a small brush (like an old toothbrush) or a toothpick to gently scrub the face of the showerhead and poke out any remaining debris from the individual spray holes.
- Flush Before Reinstalling: Before reattaching the showerhead, run water through it for a minute to flush out any loosened mineral particles.
- Consider a Filter: If you have particularly hard water, installing a showerhead filter can significantly reduce future mineral buildup, extending the time between cleanings.
When to Call a Professional
While cleaning is a straightforward DIY task, professional help may be needed if issues persist. If you've thoroughly cleaned the showerhead and still experience low water pressure, it could indicate a more significant problem, such as a clogged shower valve, a blockage further down the pipe, or a failing pressure-balancing unit. A licensed plumber can diagnose these complex issues and perform the necessary repairs to restore proper water flow to your entire shower system.
9. Test Toilet Fill Valves and Flush Mechanisms
A running toilet is one of the most common, and costly, sources of household water waste. The internal components, such as the fill valve and flapper, wear out over time, leading to silent leaks that can drastically increase your water bill. Regularly testing these flush mechanisms is a critical part of any plumbing maintenance checklist, preventing waste and ensuring your toilet functions efficiently.
This simple inspection helps identify worn-out parts before they fail completely. According to the EPA, a single leaky toilet can waste over 200 gallons of water per day, which is why local water authorities in areas like Sarasota and Port Charlotte often provide free toilet leak detection kits. Addressing a worn flapper or a misaligned fill valve can save a household thousands of gallons of water annually.
DIY Toilet Maintenance Tips
You can easily check your toilet's internal components for leaks and proper function with a few simple steps. This check should be performed at least twice a year.
- The Dye Test: Add a few drops of food coloring or a dye tablet into the toilet tank. Wait 15-20 minutes without flushing. If any color appears in the toilet bowl, you have a leak, most likely caused by a worn-out flapper.
- Check the Water Level: The water level in the tank should stop about one inch below the top of the overflow pipe. If it's too high, it's constantly draining. You can adjust the float arm on older models or the float cup on newer fill valves to correct the level.
- Listen for Phantom Flushes: Pay attention to your toilet when it's not in use. If you hear it refilling on its own as if it was just flushed, the fill valve is likely failing to create a proper seal.
When to Call a Professional
While replacing a flapper or a fill valve is a common DIY project, there are times when professional help is needed. If you've replaced the internal parts and the toilet continues to run, or if you notice water pooling around the base of the toilet, it's time to call a plumber. These symptoms can indicate more complex issues, such as a cracked flush valve, a problem with the water supply line, or a faulty wax ring seal, all of which require professional diagnosis and repair to prevent significant water damage.
10. Clean and Clear Ventilation Pipes (P-Traps and Vent Stacks)
Your plumbing system isn't just about water coming in and out; it also needs to breathe. Vent stacks, which typically extend through your roof, allow sewer gases to escape and prevent a vacuum from forming in your drain system. A blocked vent can cause slow drains, gurgling noises, and unpleasant odors, making vent maintenance a critical part of any plumbing maintenance checklist.
This crucial but often overlooked maintenance prevents mysterious drainage issues. For instance, many homeowners are surprised to learn that gurgling toilets or multiple slow drains are often caused by a blocked vent stack on the roof, not a clog deep within the pipes. Studies show that clearing a blocked vent stack can resolve these types of widespread drainage problems in up to 90% of cases.
DIY Vent and P-Trap Maintenance Tips
Maintaining your P-traps and vent stacks is a manageable task that can prevent significant problems. These components are essential for the proper function of your entire drainage system.
- Listen for Gurgling: Gurgling sounds from your drains or toilet are the most common sign of a vent blockage. Air is being pulled through the P-trap water seal because it can't enter through the vent stack.
- Inspect Roof Vents: Annually (and safely), inspect the vent pipes on your roof. In Florida, it's common to find leaves, twigs, or even birds' nests causing a blockage. Remove any visible debris.
- Clean P-Traps: The U-shaped pipe under your sinks (the P-trap) can collect debris. Place a bucket underneath, unscrew the connectors, and empty the trap's contents. Rinse it thoroughly before reassembling.
- Maintain the Water Seal: After cleaning a P-trap, run water for a minute to ensure the trap refills. This water barrier is what blocks sewer gases from entering your home.
When to Call a Professional
While you can handle basic inspections and P-trap cleanings, roof-level work carries risks. If you are uncomfortable getting on your roof or if you've cleared visible debris from the vent and are still experiencing issues, it's time to call a professional. A plumber can use a long plumbing snake or auger to clear deep blockages safely. If you suspect a major obstruction or a problem within the main sewer line, a professional has the tools, like cameras and hydro-jetting equipment, to diagnose and resolve the issue correctly.
10-Item Plumbing Maintenance Checklist Comparison
| Item | Implementation complexity | Resource requirements | Expected outcomes | Ideal use cases | Key advantages |
|---|---|---|---|---|---|
| Drain Cleaning and De-clogging | Medium — simple DIY to professional hydro-jetting | Basic tools (snakes, plungers); enzymatic cleaners; pro service may be costly | Restored flow; fewer backups; reduced odors | Kitchens, bathrooms, restaurants, recurring clogs | Prevents emergencies; improves drainage; extends system life |
| Inspect and Clean Aerators | Low — quick, simple removal and cleaning | Minimal tools; vinegar; occasional replacement parts | Improved pressure; water savings; smoother flow | Homes with low faucet pressure; hard-water areas | Fast, cheap water-efficiency gains; easy DIY |
| Check for Leaks and Water Damage | Low–Medium — visual checks to professional detection | No tools for visual checks; moisture sensors or pro leak detection for hidden leaks | Early damage prevention; lower repair costs; reduced waste | Older homes, high water bills, crawlspaces/basements | Prevents major structural/mold damage; saves money long-term |
| Flush Water Heater Tank | Medium — involves shutdown and draining | Garden hose, basic tools; pro service optional ($100–$200) | Improved efficiency; longer heater life; better water quality | Hard-water regions; older heaters; reduced hot-water performance | Energy savings; extends equipment lifespan; prevents failure |
| Insulate Exposed Pipes | Low — simple DIY; some areas tight | Foam sleeves, heat tape (if needed); low material cost ($20–$50) | Reduced heat loss; freeze protection; small energy savings | Unheated basements/attics, cold climates, mobile homes | Prevents burst pipes; low cost; easy installation |
| Test and Service Sump Pump | Medium — testing is easy; full service more involved | Water for tests, basic cleaning tools; backup batteries cost $500+ | Prevents basement flooding; protects foundation and belongings | Homes with basements or below-grade areas | High flood-prevention value; catches failures before storms |
| Check and Repair Caulking Around Fixtures | Low — straightforward DIY | Caulk, gun, scrapers; inexpensive supplies ($15–$30) | Restored watertight seals; prevents rot and mold | Bathrooms, tubs, showers, wet perimeters | Low-cost prevention; immediate leak stop; improves appearance |
| Inspect and Clean Showerheads | Low — quick soaking and brushing | Vinegar, brush; replacement heads if needed | Restored spray pattern; improved pressure and efficiency | Hard-water homes; guest bathrooms, frequent-use showers | Fast, zero-cost method to improve performance |
| Test Toilet Fill Valves and Flush Mechanisms | Low — simple diagnostics and part swaps | Replacement parts $10–$50; basic tools | Stops running toilets; large water savings; lower bills | Any home with older toilets or high water bills | Cheap repairs; significant water conservation; DIY-friendly |
| Clean and Clear Ventilation Pipes (P‑Traps & Vent Stacks) | Medium — under-sink easy; roof vent work higher risk | Hand tools, snakes; ladder and safety for roof vents; pro gear if blocked | Restores drain venting; eliminates odors and gurgling | Homes with slow drains, roof obstructions, winter ice issues | Restores full system function; prevents sewer gas entry |
Your Partner in Proactive Home Plumbing Care
Navigating the demands of homeownership, especially in the unique climate of Southwest Florida, can feel overwhelming. However, by embracing the power of proactive maintenance, you can transform potential plumbing catastrophes into manageable tasks. This comprehensive plumbing maintenance checklist is more than just a list of chores; it's a strategic roadmap designed to empower you, the homeowner, to protect your most valuable asset.
You have learned how to tackle monthly tasks like cleaning drains and inspecting aerators, seasonal duties such as flushing your water heater and insulating pipes, and annual responsibilities like testing your sump pump and inspecting vent stacks. Each check, each small action, is a deposit into your home's long-term health and your own financial well-being. By integrating these practices, you are not just preventing leaks; you are actively extending the lifespan of your entire plumbing system, conserving precious water resources, and saving significant money on utility bills and emergency repair costs.
The Value of a Consistent Routine
The true power of this checklist lies in its consistent application. A one-time effort is good, but a sustained routine is what builds a resilient home. Think of it like this: a small, unnoticed drip from a faulty toilet flapper can waste over 6,000 gallons of water a month. A simple annual check, as outlined in our guide, can catch this issue when it costs pennies to fix, rather than hundreds of dollars on your water bill.
The goal is to shift your mindset from reactive panic to proactive confidence. When you know the signs of a failing water heater, understand the importance of clear P-traps, and can spot deteriorating caulk before water intrusion occurs, you are in control. This knowledge demystifies your home’s plumbing, turning a complex network of pipes and fixtures into a system you can understand and manage effectively.
Knowing When to Call for a Professional Eye
While this guide equips you with the skills for many DIY tasks, it also highlights a critical aspect of responsible homeownership: recognizing your limits. Some situations inherently carry more risk or require specialized tools and expertise. Attempting to clear a deep-seated main line clog without professional equipment can worsen the problem, and improperly servicing a water heater's pressure relief valve can create a serious safety hazard.
This is where a partnership with a trusted professional becomes invaluable. A licensed plumber doesn't just fix problems; they provide a deeper level of inspection and diagnostic insight that can uncover hidden issues before they escalate. For homeowners in Port Charlotte, Cape Coral, and across the Tampa Bay region, having a reliable expert on call provides the ultimate peace of mind. Your diligence in performing the DIY checks on this plumbing maintenance checklist makes you an informed partner in your home's care, enabling you to have more productive conversations with professionals when their help is needed. Ultimately, this combination of your hands-on effort and expert support creates the most robust defense against unexpected plumbing failures.
Ready to take your home's plumbing health to the next level or need a professional eye on a persistent issue? The certified experts at Heatwave Air Conditioning, Plumbing, & Electric are here to serve as your trusted partner, offering comprehensive inspections and expert service tailored to the specific needs of Southwest Florida homes. Schedule your free estimate today and ensure your home's plumbing is in the best possible hands.